
The Audiobook Mastering Guide


A technical overview for creating high quality audiobooks with Findaway Voices.
Update April 30, 2019: We now have a video version of the mastering guide. Check it out here:
Producing and distributing through Findaway Voices is the best way to reach listeners wherever they are, but with our wide vendor network comes the need to meet the technical requirements of dozens of companies.
Whether you’re an author uploading an already-created audiobook to distribute, or you’re a narrator creating new audiobooks, every audiobook that passes through Findaway Voices has to meet our technical requirements.
In this post, we’ll give you some more context around our requirements, along with tips on how to meet them, and other best practices. Following the steps outlined in this guide will ensure you pass this QA process and get your audiobook in front of new listeners.
Start with Great Audio
If you start with poor-quality audio, there’s only so much you can do to improve it in the editing room. Garbage in, garbage out, as they say.
Record in a sound-proofed environment.
You might not notice the everyday background noise of a fan or water heater, but they can detract from your performance and impact your noise floor. Whenever I record with a new setup, I start by recording a 10-minute segment of room tone, then measure noise levels and listen closely for any distractions.
Invest in hardware.
Get closed-back headphones, a nice microphone (not a laptop or smartphone), and a wind screen. Then narrate 5–7 inches from the microphone to minimize sibilance and plosives. Sound proofing is crucial but if a full home studio is out of your budget, a nice reflection filter can be a solid alternative.
Know your tools.
Pick a solid Digital Audio Workstation (“DAW”) and understand how to fully leverage it. We highly recommend Adobe Audition for standard vocal work.
Mastering Audio
File Format & Quality Settings
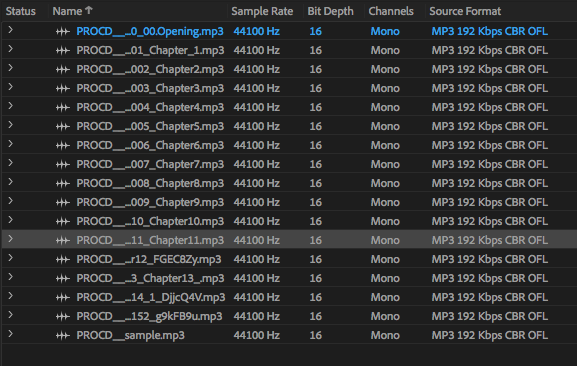
All audio files must be provided in FLAC or MP3 (192 kbps or higher), a sample rate of 44.1 kHz., and all files must be in mono or stereo (but not a combination of both).
If it’s too late for that and you only have lower-quality files to work with, load the audio files into a DAW and re-export them with the right specs. This isn’t ideal, as it will make your files bigger with no audible increase in quality — it’s like stretching a digital image, you can’t add more quality by upsampling the audio.
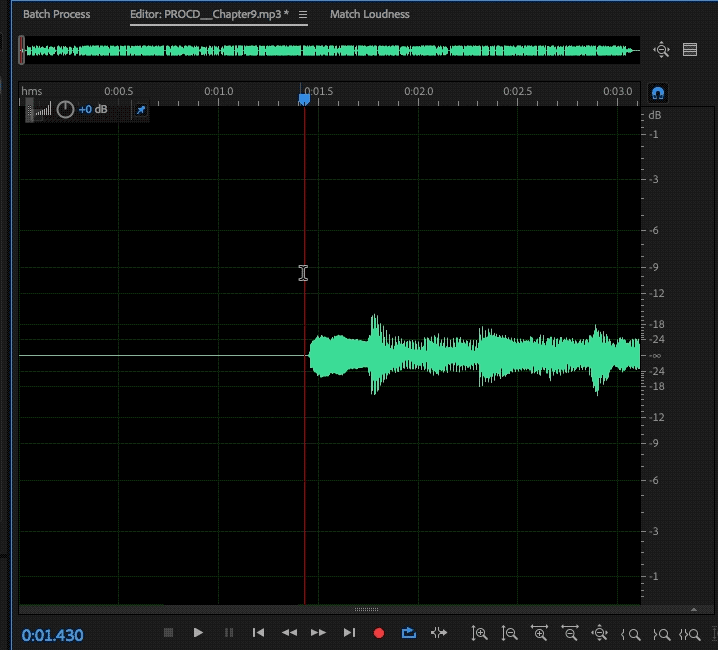
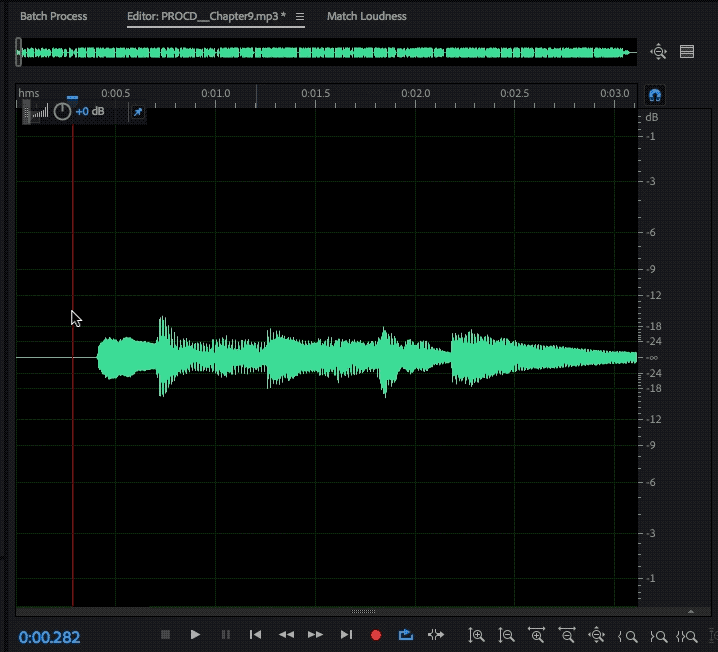
Room Tone
Each individual file must contain between 0.5–1 second of room tone at the head, and between 1–5 seconds of room tone at the tail.
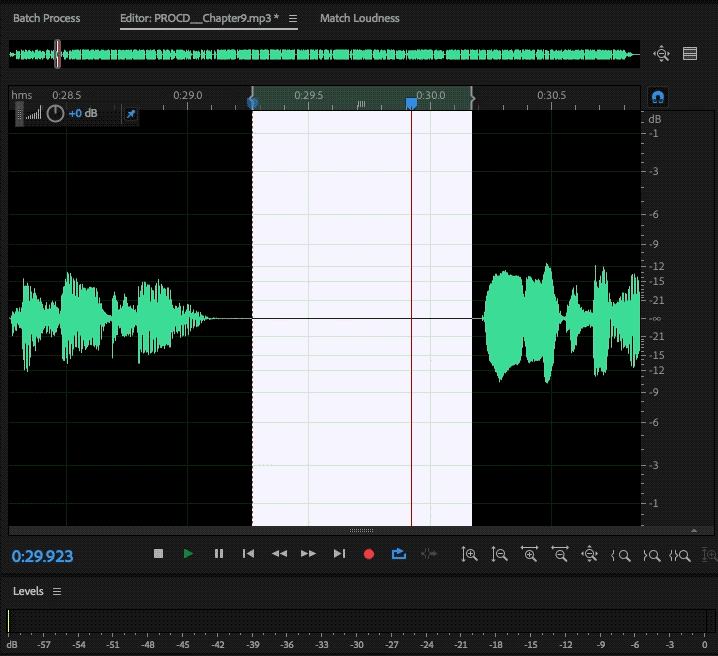
Room tone is the sound of your recording environment while you aren’t performing, which is especially noticeable at the beginning (head) and end (tail) of each chapter.
Start by aligning all of your audio files at the start of the timeline in your DAW and visually reviewing the start of the wave compared to the timer at the top! You’re going to do the same for the tails of each audio file (although that’s a little tougher, since those don’t line up)
As you’re reviewing, if you have too much room tone, it’s a simple fix to cut the audio back a bit.
If you don’t have enough room tone, copy a sample of room tone and paste the sample where needed. Whenever you add or remove room tone, make sure the tone is seamless and passes an ear test!
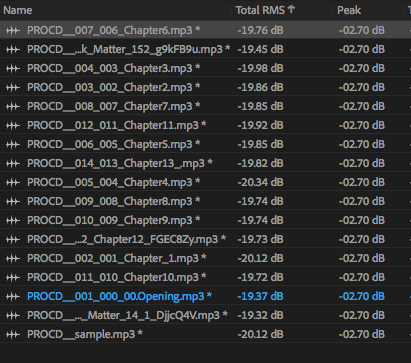
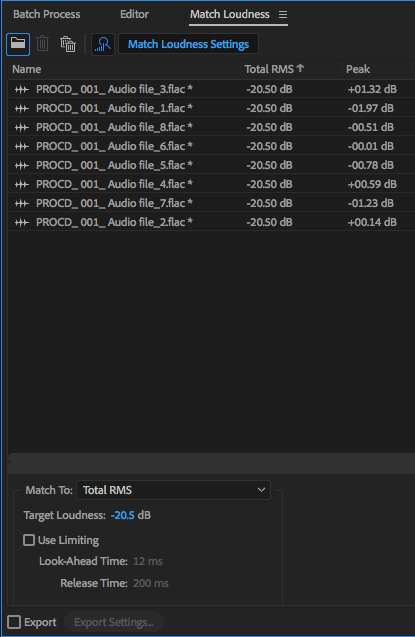
RMS
RMS for each file must measure between -23dB and -18dB, with peak values below -3dB, and a maximum -60dB floor.
RMS is the measurement of the average loudness of an audio file, the peak measures the loudest volume reached, and the noise floor measures the loudness of your room tone. You should only tweak these settings after you’re done editing/processing and the files are are ready to be exported.
First, use an RMS management setting to set a target RMS of -20 dB. RMS controls are typically found either as a dedicated tool/control or nested under compressor options (you may need to download a third-party plugin).
Make sure your DAW processes and applies the changes before moving forward. Some, like Audition, have a process feature in the work station, but if your DAW doesn’t, you’ll need to export and re-import the file in order to process and continue.
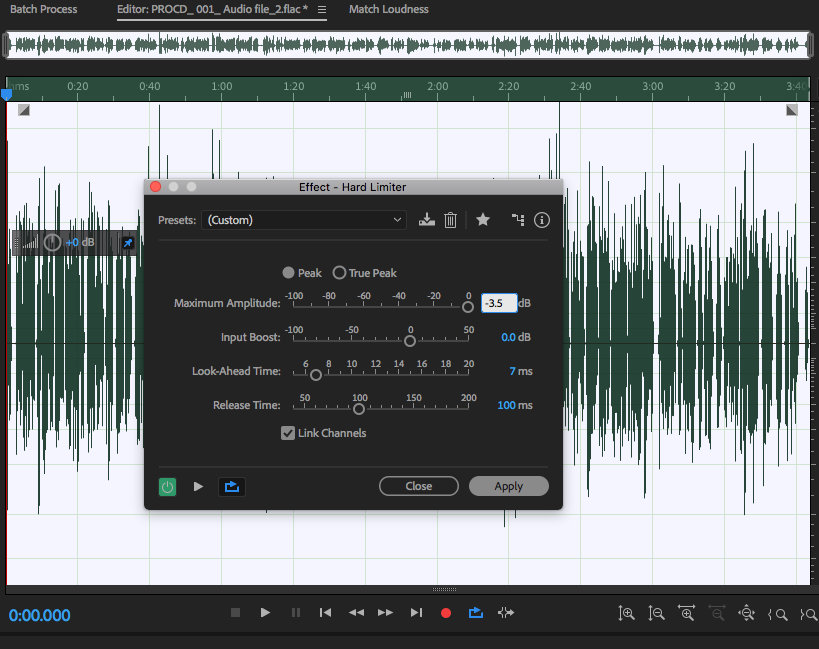
Next, adjust the peak using a limiter (not a peak amplification tool). We recommend running the limiter at -3.5 dB for any files you submit, since it’ll only impact audio that breaks our rules. Don’t forget to process the setting change, as as outlined above.
Unlike peaks and RMS, which are generally safe to process for all files, noise floors are particularly complex to fix after recording, so its best to solve them by having a great recording environment. You can check your noise floor by listening to a section of room tone on loop and keeping an eye on the volume meter to see if it exceeds -60 dB.
The noise floor of your audio file can be adjusted by using a gate/compressor with an active pass trigger to only compress audio under a certain threshold. Applying compression is an art: too little is ineffective, and too much will make your audio hard to listen to. When using this tool, adjust the attack and release setting to keep the dynamic processing unnoticeable and to prevent the audio from pumping and breathing.
Make sure as you wrap up mastering, you always re-test your files against our requirements prior to re-submitting to Findaway Voices.
Conclusion
By starting with a fantastic recording environment and taking the right steps during the mastering of your audiobook, you’ll always produce audio ready to go to all of the major audiobook vendors out there, while also providing a great listening experience.
About The Author
Wes has been producing audiobooks, music, live audio, and video for the past 16 years. When he’s not at his day job here at Findaway Voices, he spends more time in the booth — managing a Cleveland area recording studio and running an online company offering post production services.