
Mastering Your Audiobook for the Findaway Voices Audio Specifications: Video Deep Dive
Have you struggled to hit the required audio specs for Findaway Voices? Today, we will be teaching you how to adjust your audio files with Adobe Audition to match our technical audio requirements.

Have you struggled to hit the required audio specs for Findaway Voices? Today, we will be teaching you how to adjust your audio files with Adobe Audition to match our technical audio requirements.
Wes, our Head Mastering Engineer, walks us through this process. Watch the video here, and feel free to follow along below!
The tutorial we provide here is best tuned to content creators (that’s you) with at-home workstations and set-ups.
You may choose to use other, higher-end tools, or if you have the budget, even choose to hire someone to do this for you. However, here we'll be teaching you how to make these adjustments yourself with Adobe® Audition®!
So, strap in and get ready for an over-the-shoulder look at how exactly to master your audio files for submission to Findaway Voices. Let’s go through it step-by-step.
Using Adobe Audition
Adobe Audition is an extremely affordable digital audio workstation (DAW) for recording, editing, and mastering your audio files.
Here, Wes tackles our audio requirements in two sections:
- Audio file structure & format
- Technical audio requirements.
Let’s get started!
Audio File Structure and Format
Chapters, Credits, and Intros Must Be Standalone Files
(Jump to this section in the video)
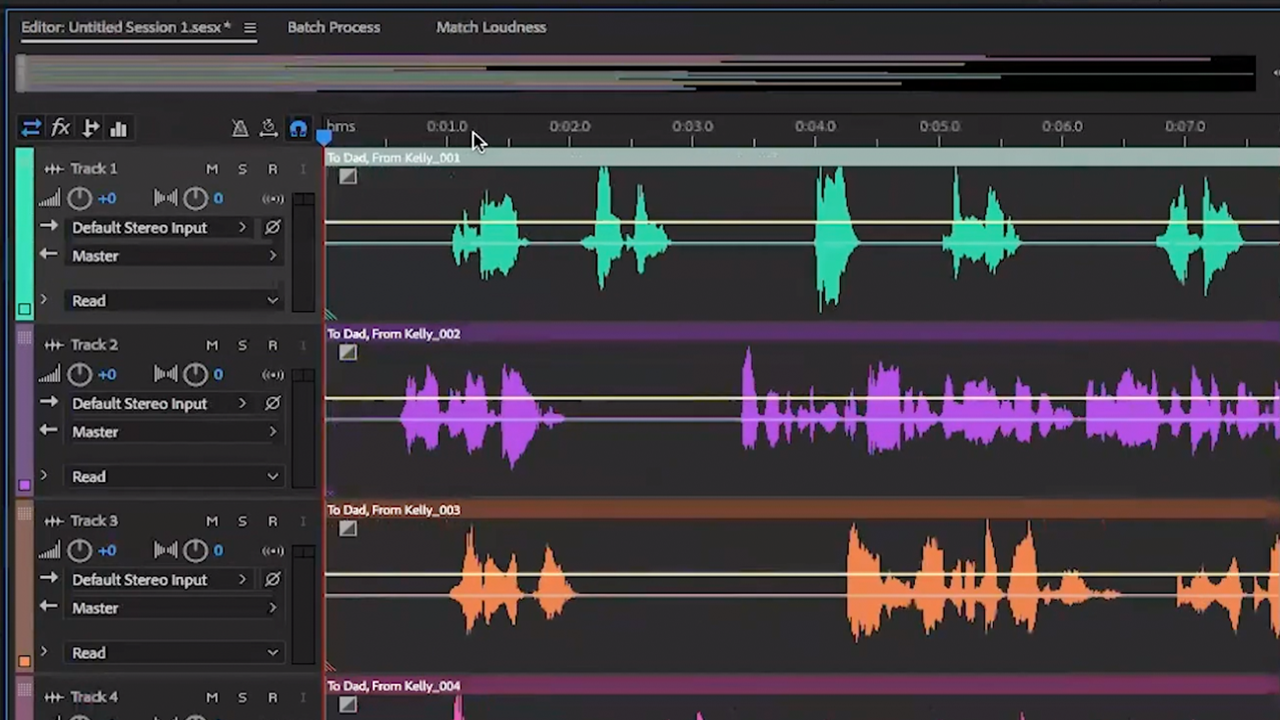
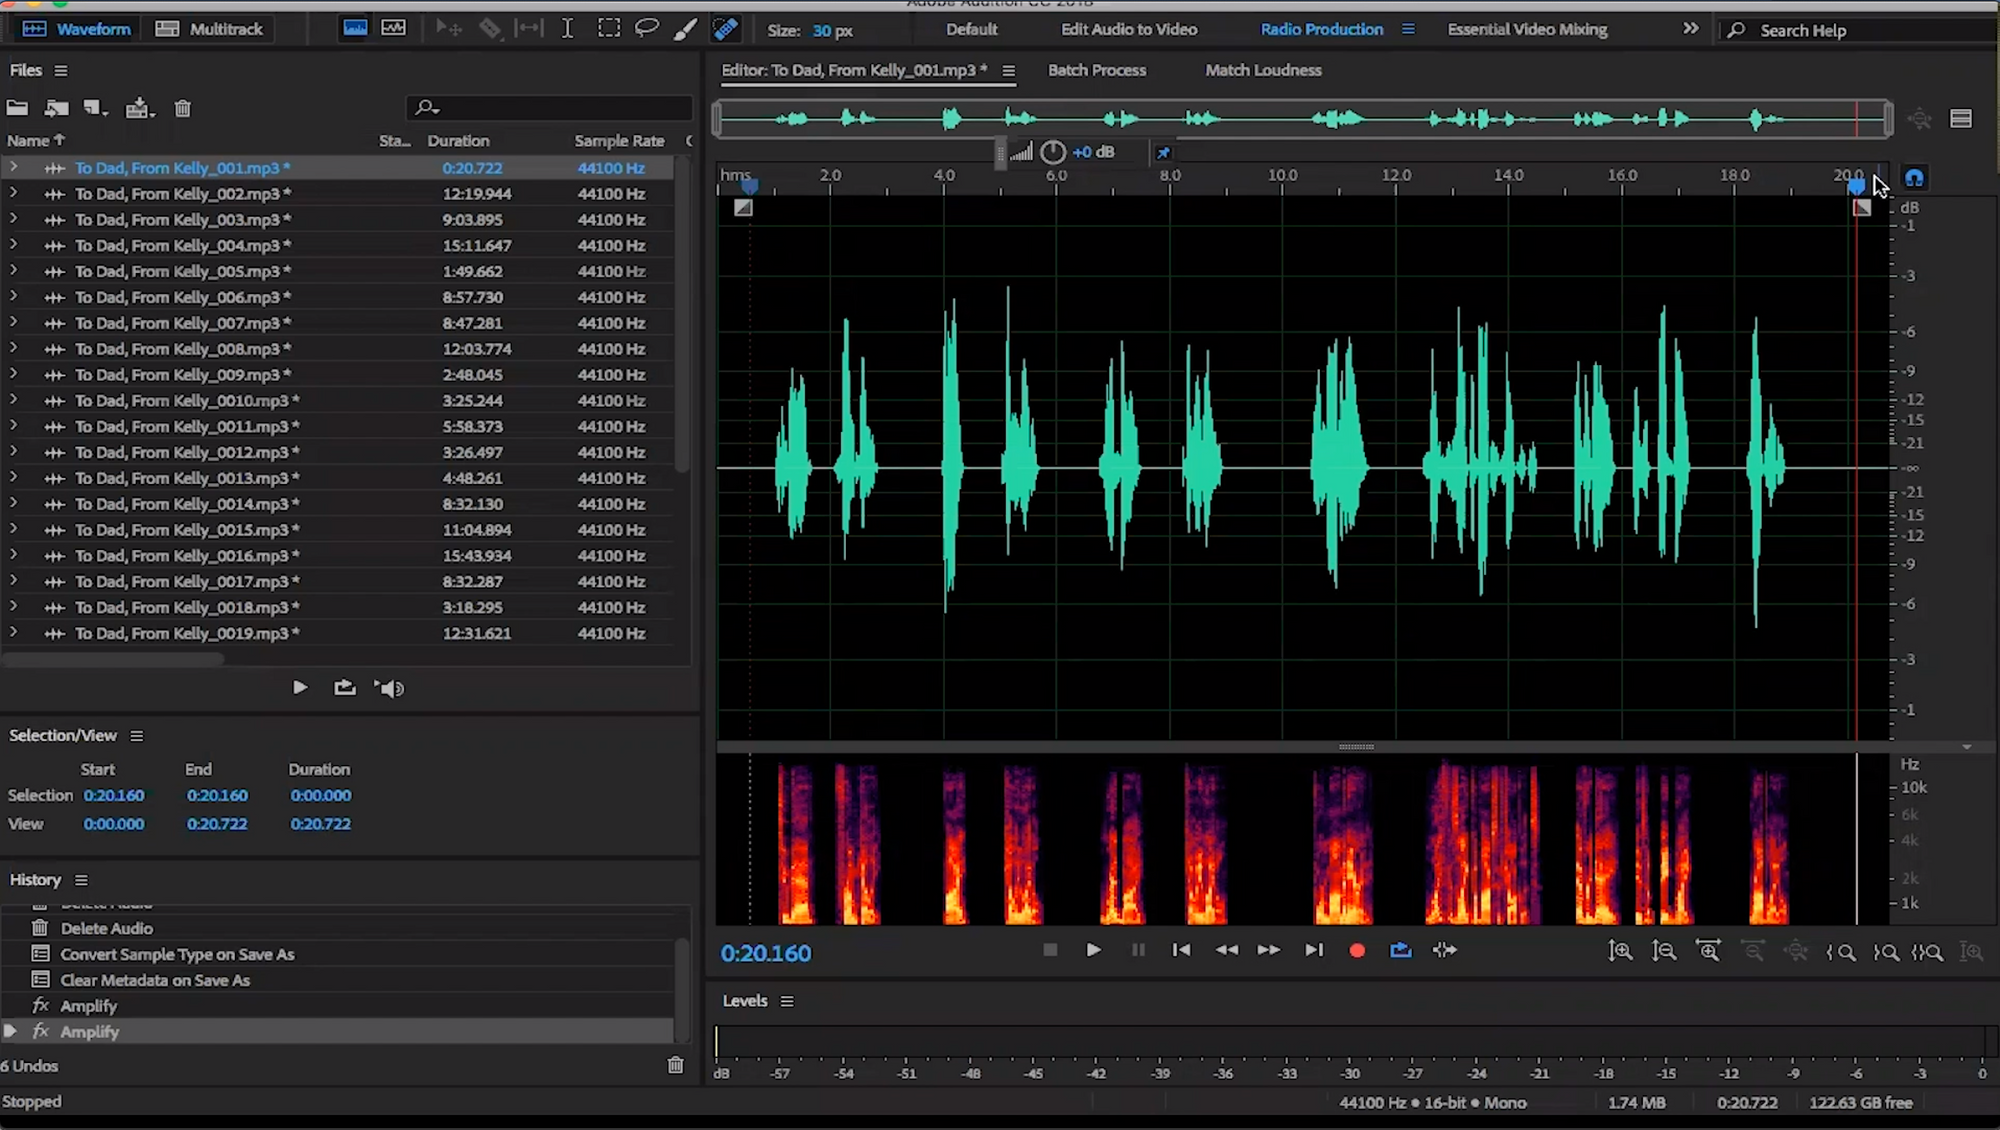
Simple enough, right? Our first specification deals with splitting the sections of your audiobook into their own separate files. Please note that each chapter of your book, as well as any credits and introductions, must be separated into their own files.
West shows as an example using the opening credits of To Dad, From Kelly by Kelly Lytle.
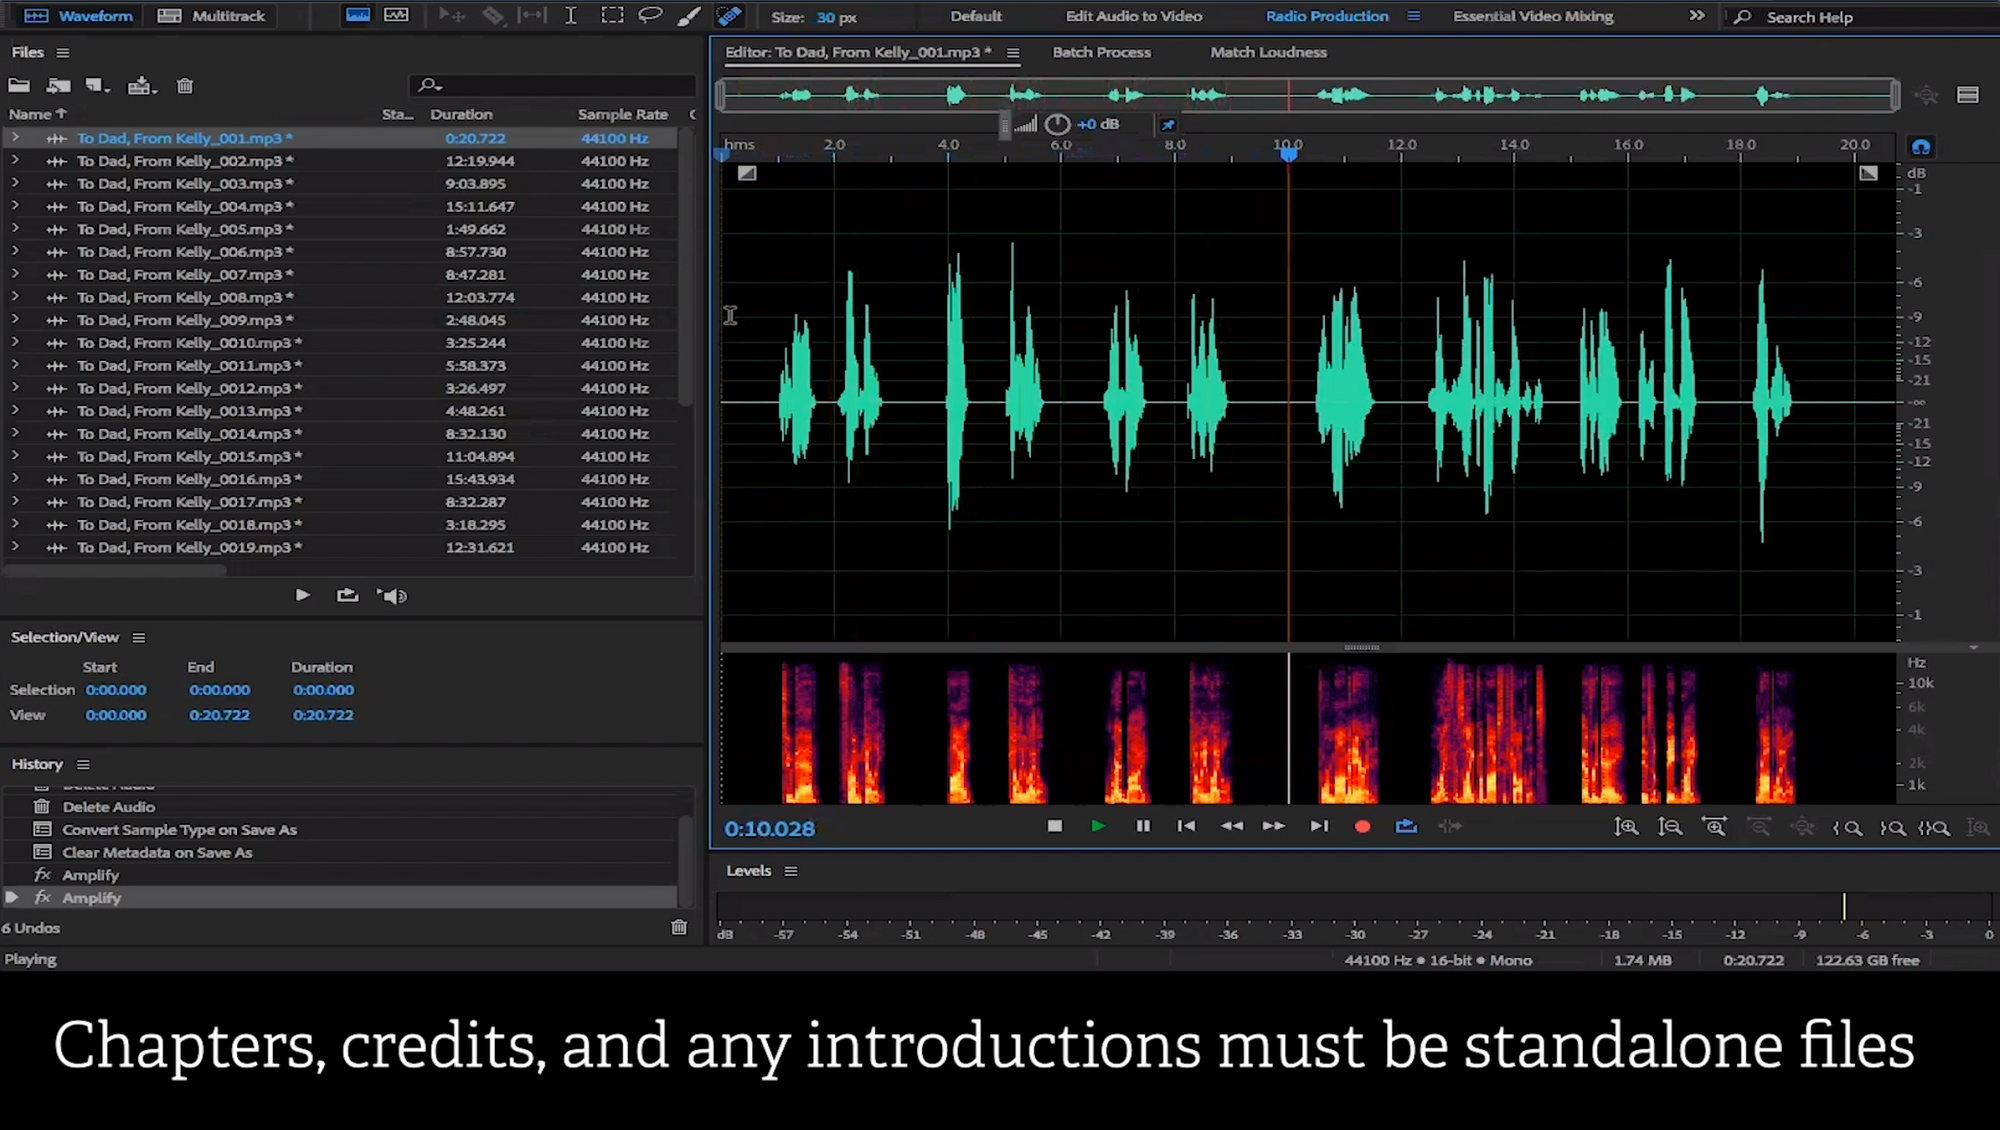
To meet this specification, simply separate the sections within Adobe Audition and save them as separate audio files. There we go. Tip number one complete.
Files Must Be No Longer Than 120 Minutes Each
(Jump to this section in the video)
As self-explanatory as it sounds, head over to the duration of each of your audio files to ensure that none of them exceed 120 minutes.
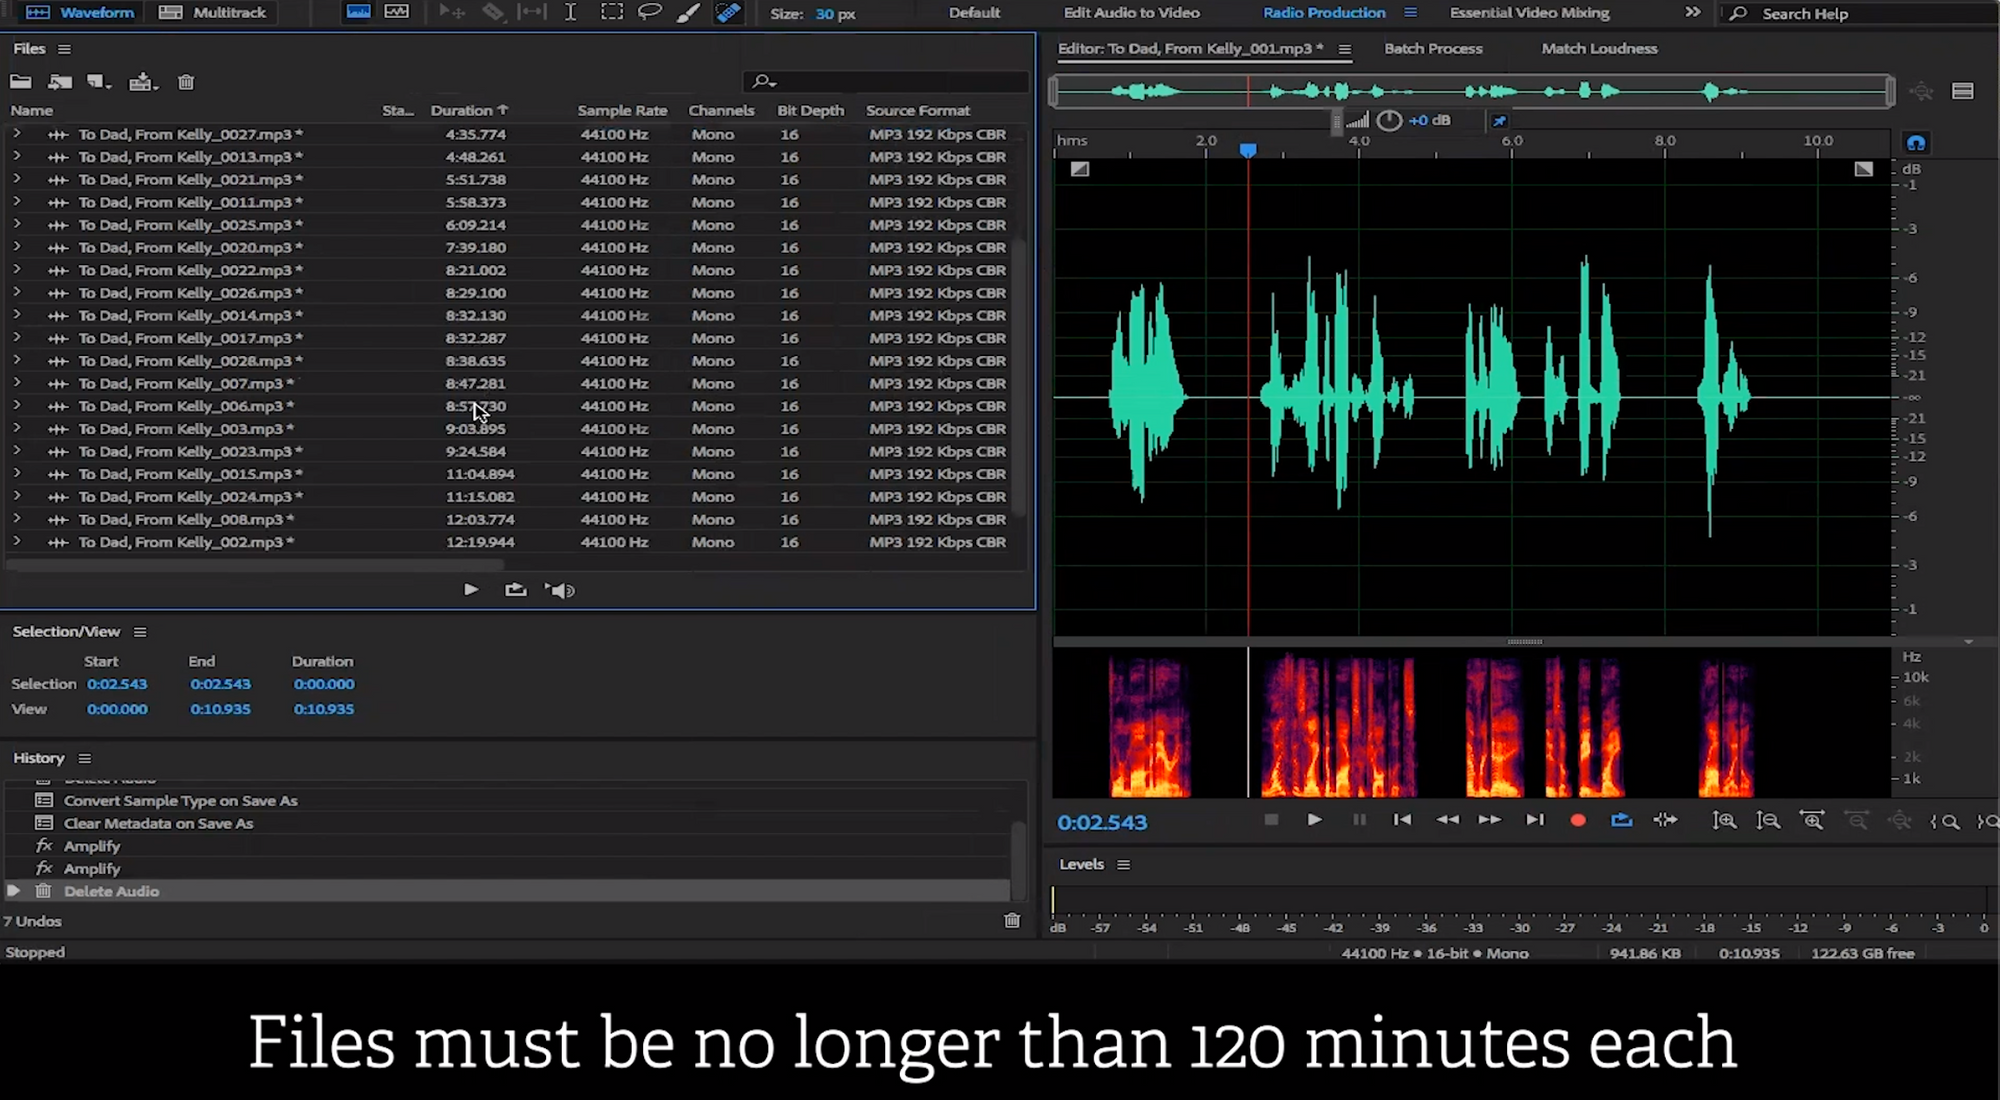
If you do have a file that is longer than 120 minutes, you will need to separate it into files that are less than 120 minutes each.
Please note that when you upload these individual sections back to the Findaway Voices site, you must name them part one, part two, etc. of the original files. For example: To Dad, From Kelly 001 (Part 1) and To Dad, From Kelly 001 (Part 2) would, combined, be longer than 120 minutes and make up the entirety of chapter one, but individually be less than 120 minutes long.
Provide Proper Order, and Start with a Verbal Indication
(Jump to this section in the video)
Next up, ensure that your audio files are properly ordered and that each audio file begins with a chapter or section heading. In the video, Wes walks us through a few examples, and you can hear the narrator announcing each section with its appropriate chapter heading or section title – such as Acknowledgements.
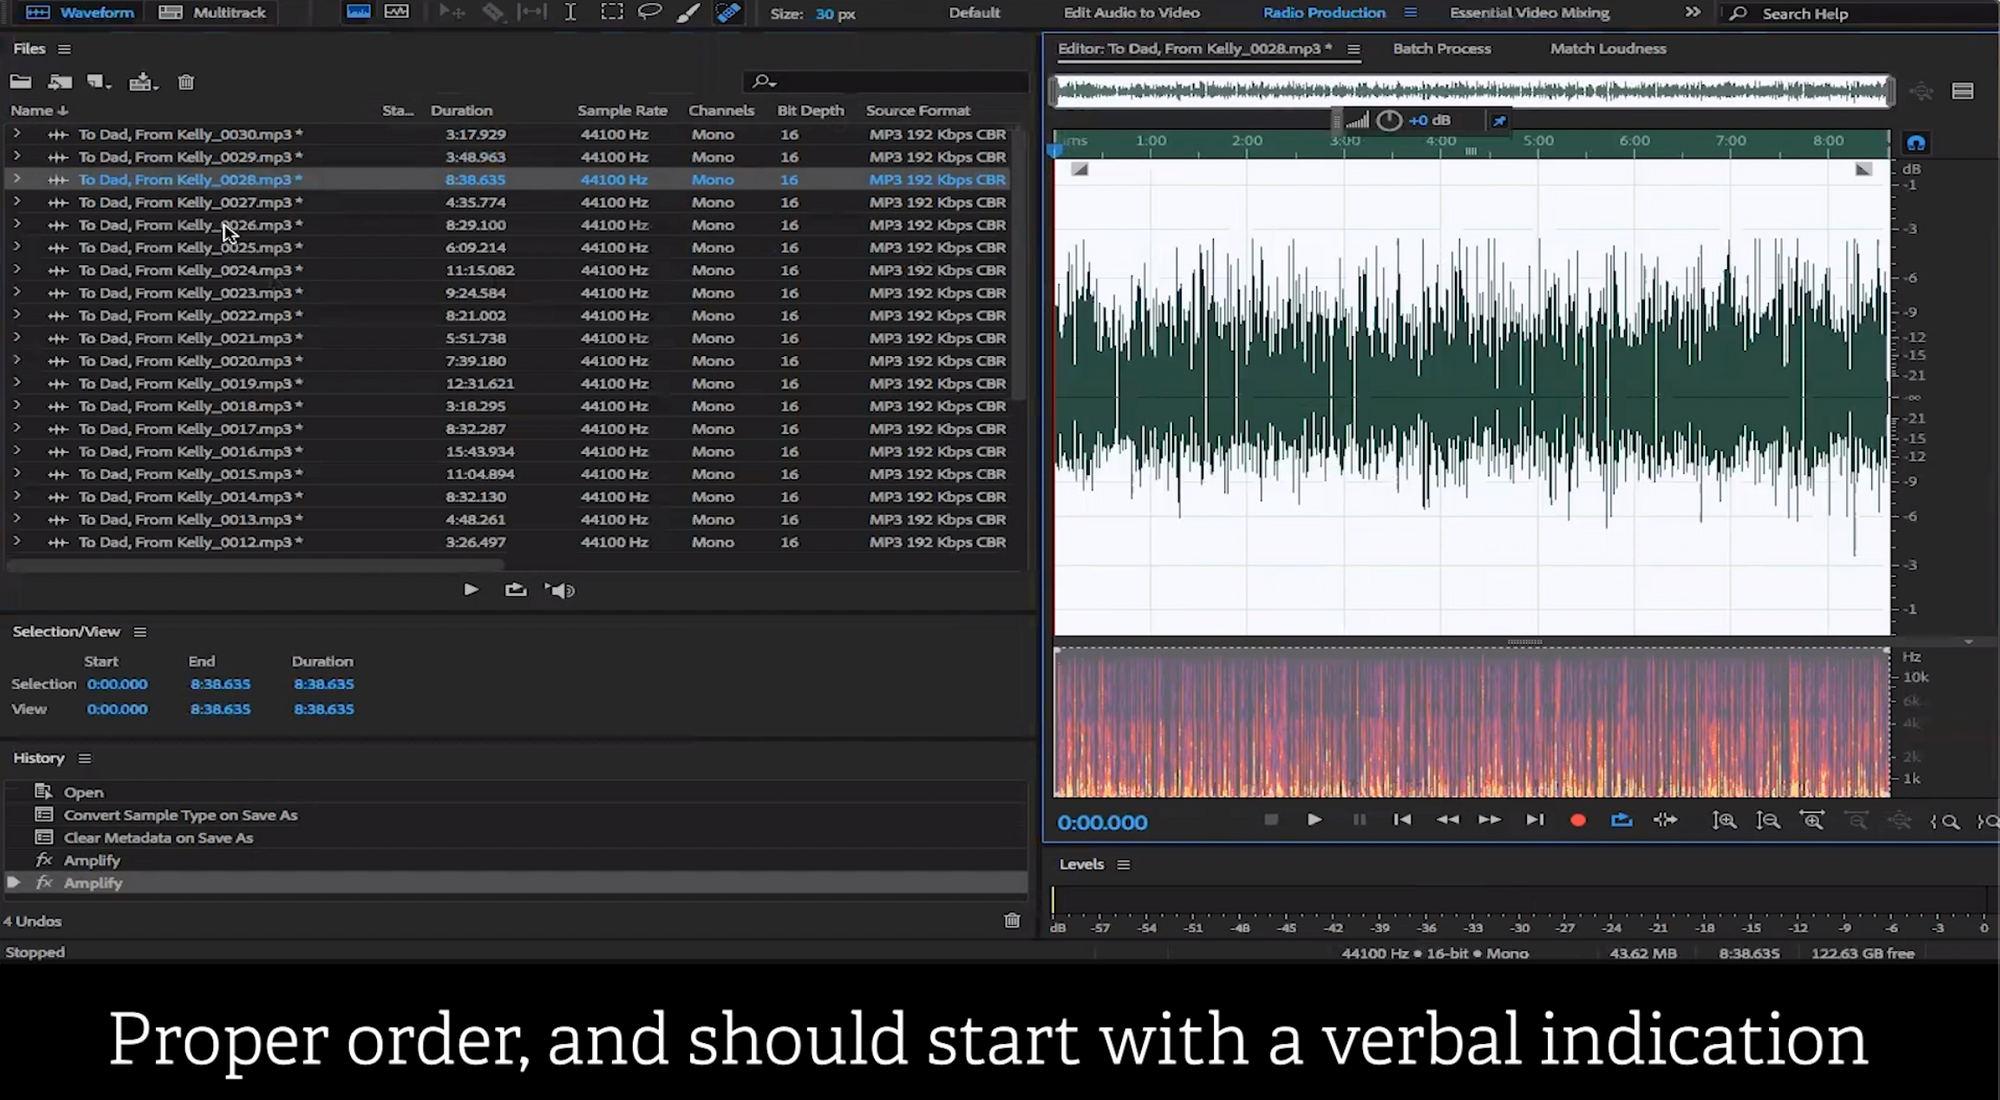
Nobody wants to listen to a story out of order, so it's good to double-check your file naming, and announcing each section with something like "Chapter 1" is extremely helpful in auditing your files for the correct name and order.
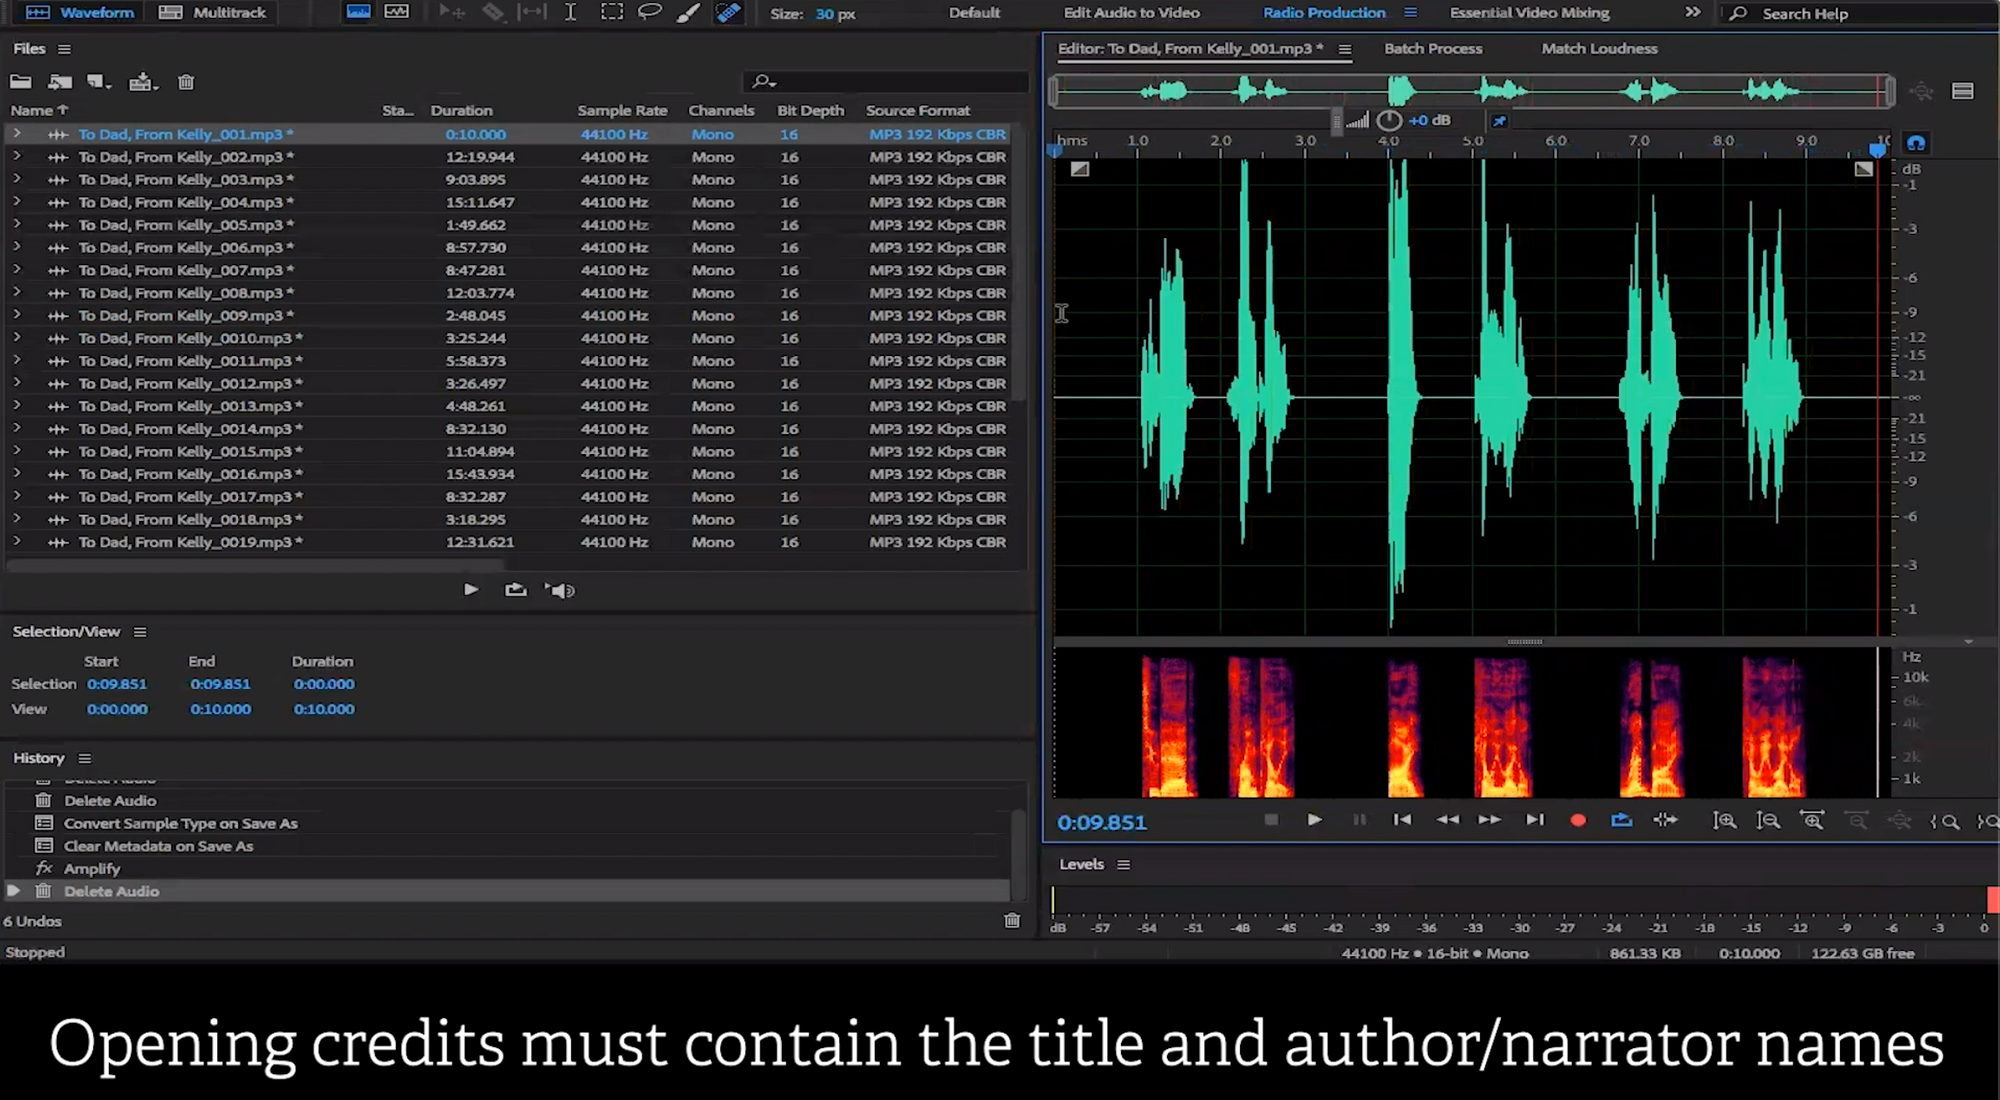
Opening Credits Must Contain the Title and Author/Narrator Names
(Jump to this section in the video)
For this specification, please ensure that the following are announced in the opening credits:
- The title
- Author’s name
- Narrator’s name
Should you choose to include additional information, here are a couple quick rules to follow:
- For book summaries or descriptions, separate them into another audio file and title it “Book Summary” or something similar.
- For copyright information, you can keep it in the opening credits section.
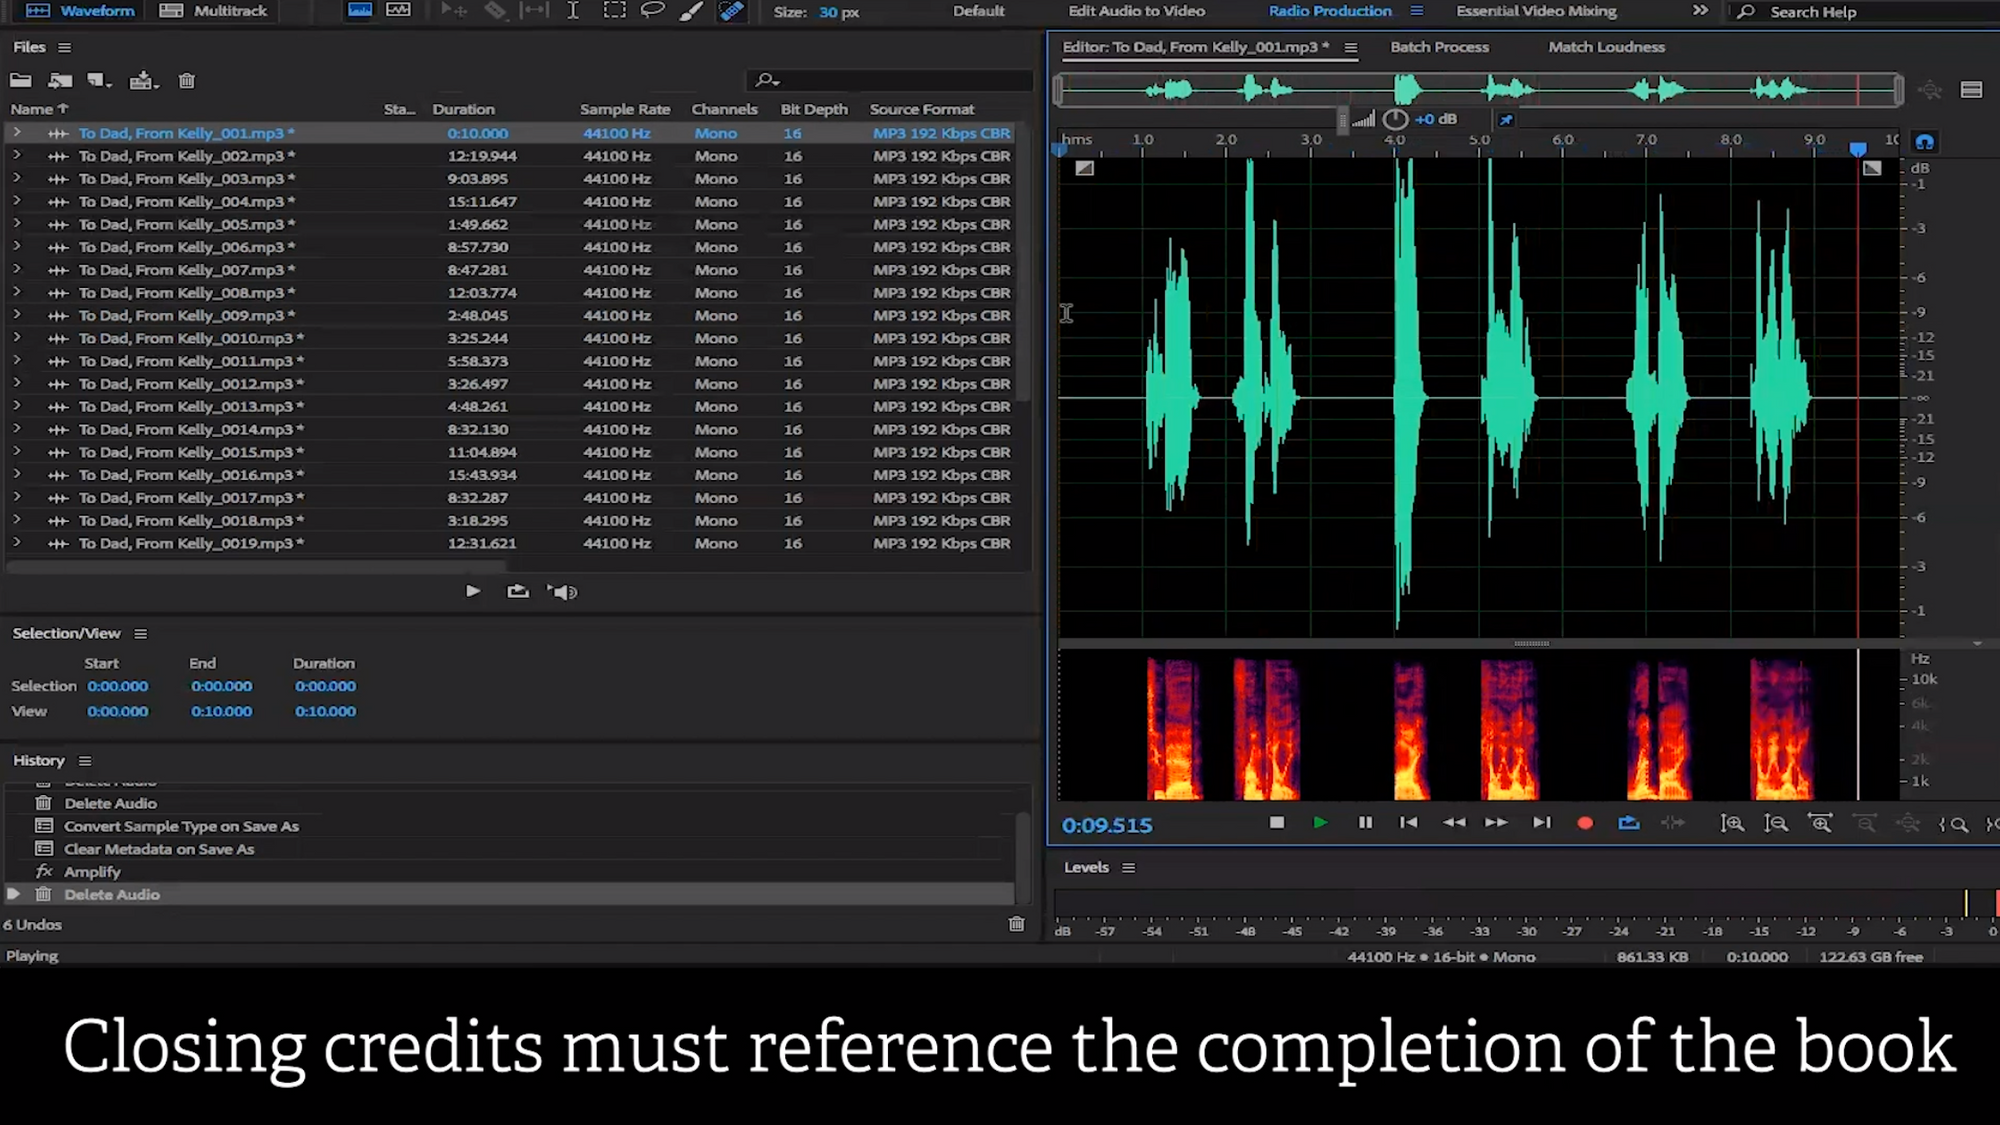
Closing Credits Must Reference the Completion of the Book
(Jump to this section in the video)
When creating your closing credits, be sure to include some stamp of closure that is easily identifiable. To demonstrate what we mean, here are two quick options: either the narrator says “the end“, or simply replay the opening credits.
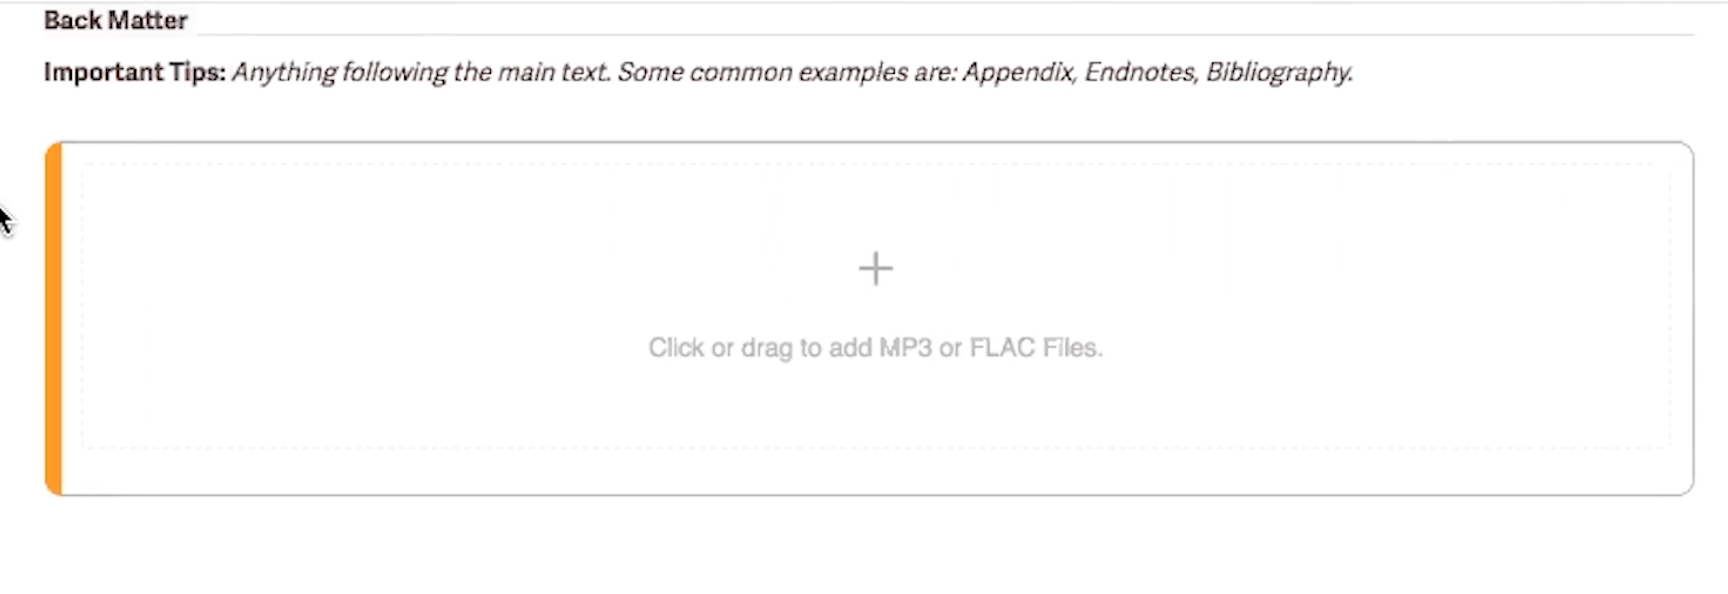
Anything past the ending of the book, such as an appendix, endnotes, bibliography, or author notes, should be saved into their own separate file and dragged into the back matter section of the upload form onto Findaway Voices.
And there you have it! That covers the audio file structure and format portion for uploading your audiobook onto Findaway Voices. Great work.
One way to tick these boxes from the start is by keeping a list of these specifications and referring to it during your preparation/pre-production stage. That way, you won’t have to worry about it. Boom.
Now, let’s move on to the technical audio requirements.
Technical Audio Requirements
It isn't enough for the audio to just sound great, it also has to conform to some very specific technical requirements. Our partners can be strict, you need to hit these specs in order to have the best chance at getting your audiobook for sale on all 30+ platforms we support.
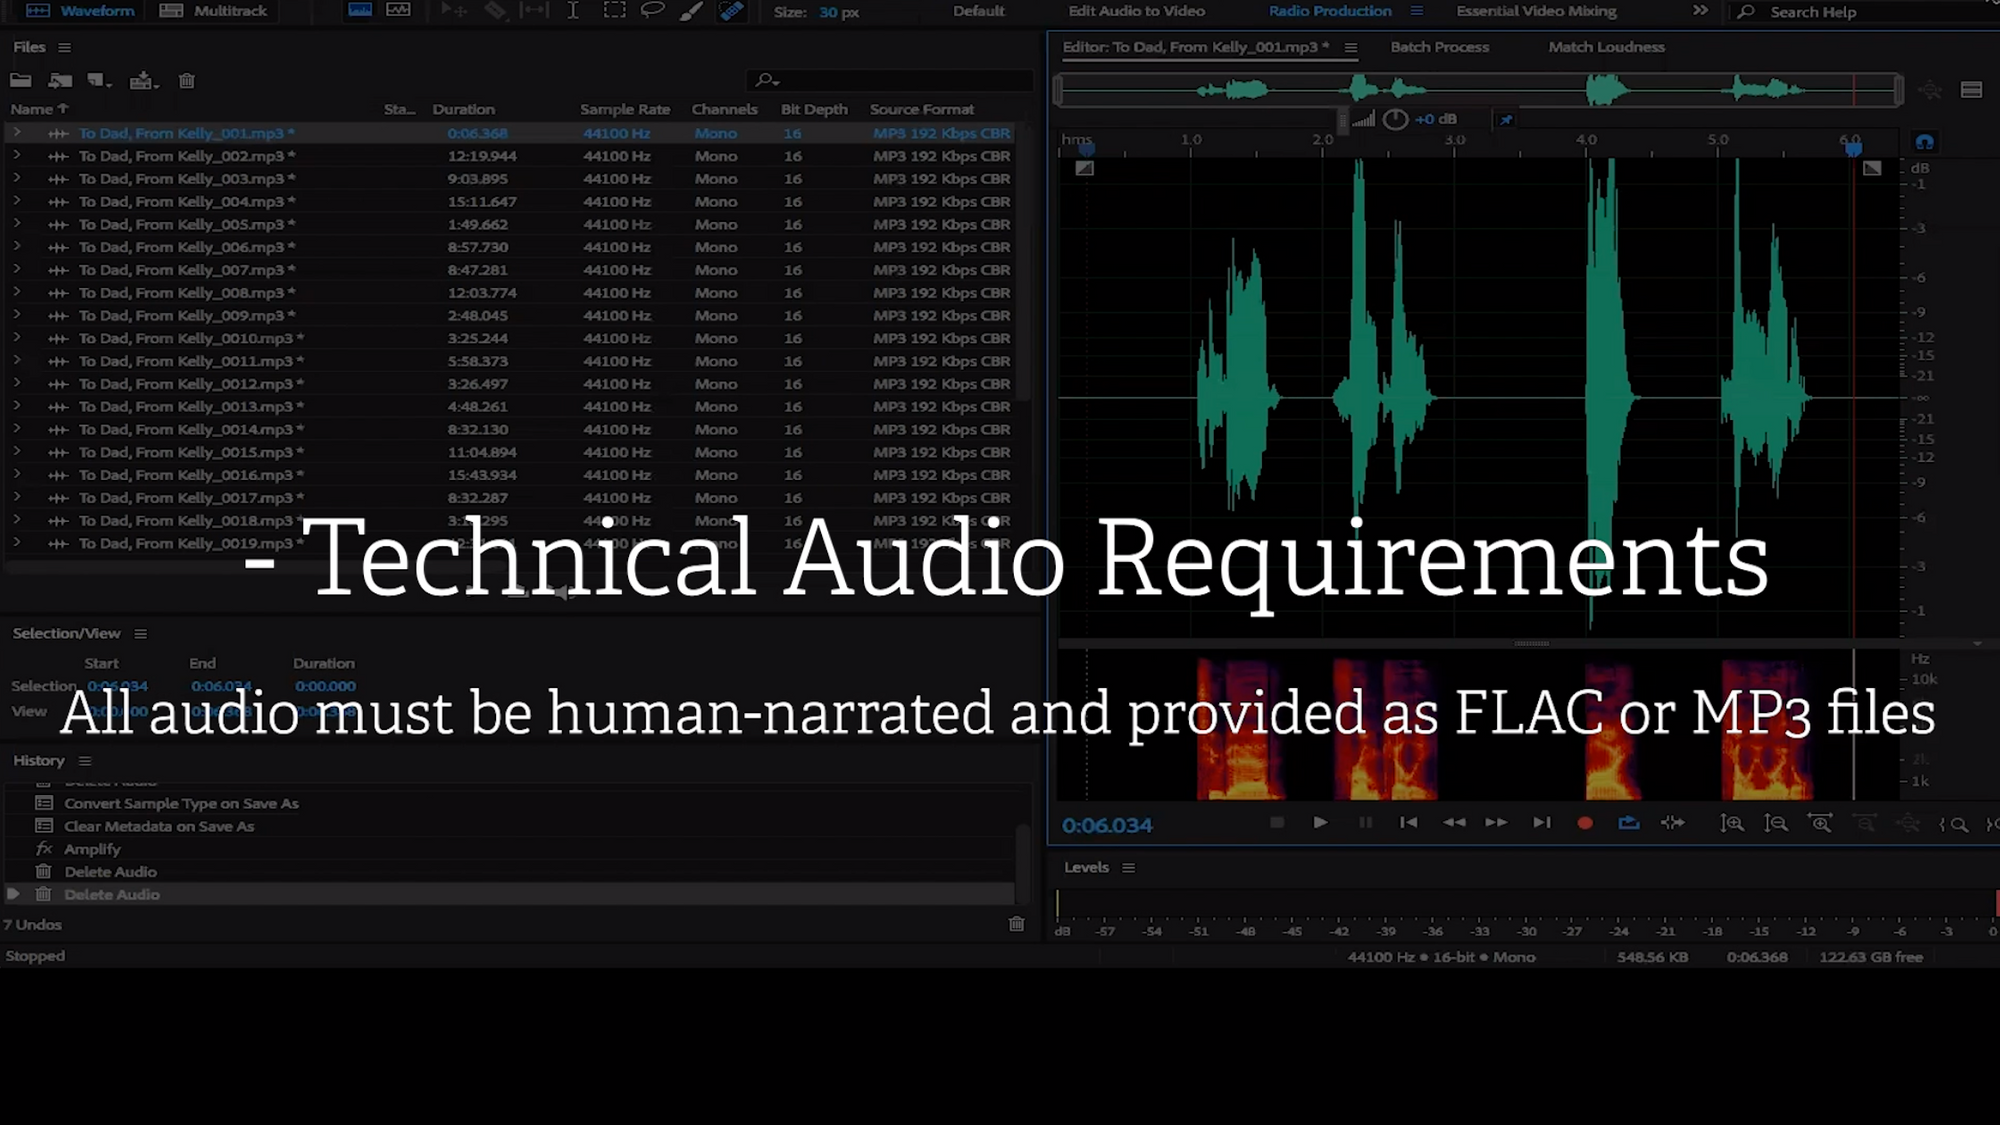
All Audio Must Be Human Narrated and Provided as FLAC or MP3 Files
(Jump to this section in the video)
There are some great text-to-speech platforms out there, but when a consumer purchases an audiobook, they are expecting a human-narrated performance. It's important for retailers to meet that expectation, and none of our partners currently support non-human narration. Any non-human-narrated audio files will be rejected by Findaway Voices.
Next, let’s ensure all of your audio files are in the correct format. Directly next to where you found the duration of your files from before is where you’ll find the source format.
Please note that as a general rule, we prefer FLAC files, as they are a higher quality file as opposed to MP3. If your software does not have an export-to-FLAC option, fret not. MP3 quality is still acceptable and differences will be unnoticeable to most listeners.
We recommend making all your edits on FLAC versions of files, as it's a lossless format.
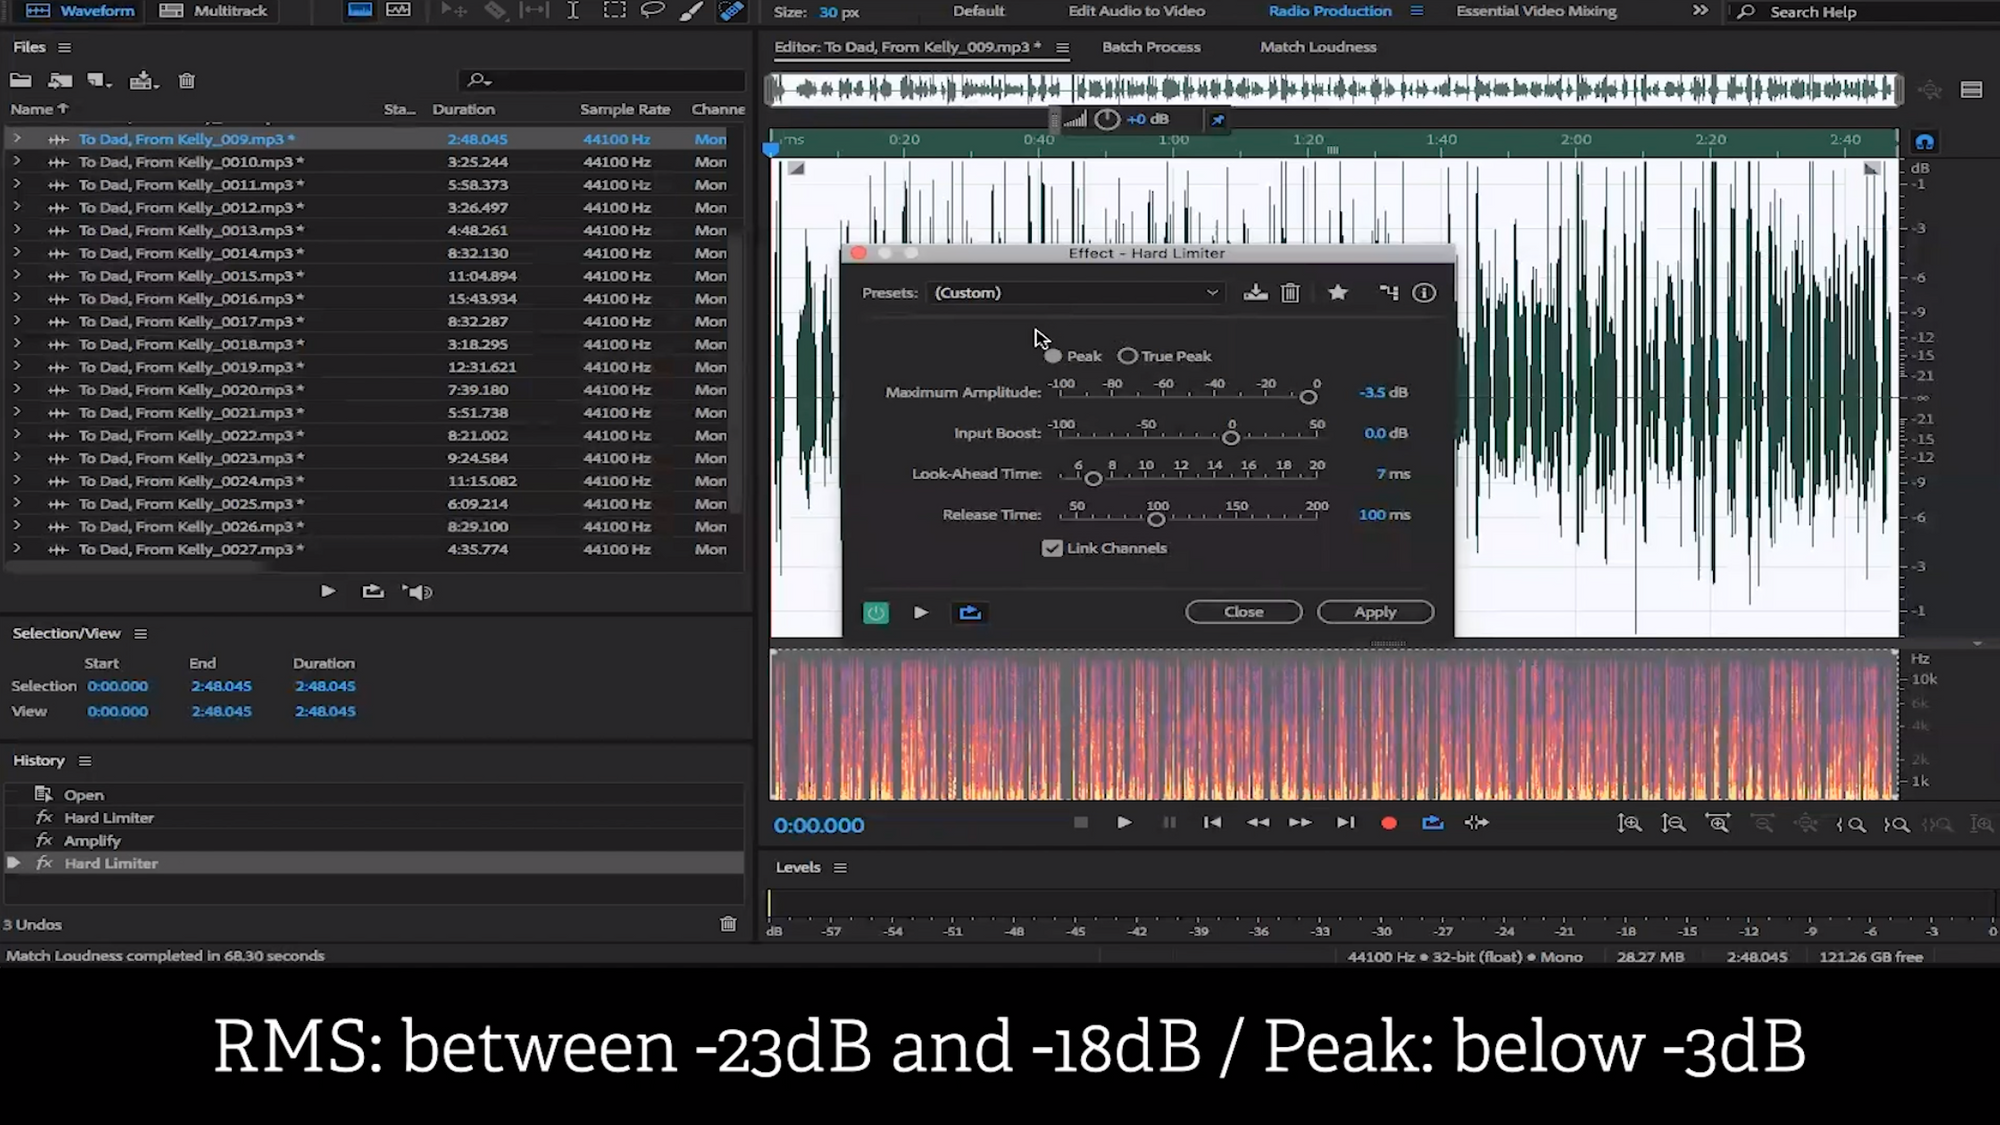
RMS Between -23 dB and -18 dB and Peak Below -3dB
(Jump to this section in the video)
This is one of the most difficult requirements for most to hit. We get the frustration of tweaking RMS values at the sacrifice of peak values, and vice versa. If you don't know what RMS and peak values are, that's OK too, because you're about to learn.

So, when speaking about RMS values and peak values, there are a couple of methods for ensuring that they fall within the accepted ranges. This requires a combination of knowing your software (in this case, Adobe Audition), and also knowing how to look for these values.
In the video, Wes shows us how Adobe Audition provides a clean read of the RMS values and peak values of each individual file.
2 Ways To Set Total RMS and Peak Values to Within Acceptable Range
(Jump to this section in the video)
Here, we get further into the nitty-gritty. Firstly, for your RMS values, look to use Adobe Audition, as it provides an extremely easy way to find an accurate reading of your RMS values with the click of just a few buttons. This is something that isn't often as easy to find in other post-production/mastering software.
In the video, Wes demonstrates that the values for his total RMS and peak values do not meet the specifications. Here is an easy way to remedy this. Ready?
ITU-R BS Algorithm
(Jump to this section in the video)
In Adobe Audition, if you navigate to the Match To section on the bottom right below your audio files, there is an ITU-R BS algorithm option that allows you to set the target loudness. Wes sets his target loudness to -20.5 dB, and his peak level to -3.5 dBTP.

After running the command within Adobe Audition, all of Wes‘s new values now fit between the correct specifications! This method is the easiest way to meet this specification.
Total RMS Feature & Hard Limiter
(Jump to this section in the video)
One more, albeit less ideal way to meet this requirement, is to use the total RMS feature within Adobe Audition to set the RMS to 20.5 dB. We recommend only using this method if the above ITU-R BS algorithm does not work.
The reasoning behind this recommendation is because with Adobe Audition’s hard limiter, you are effectively chopping your audio and making a “hard limit” at -3.5dB. We’d like to minimize any and all chopping. At the same time, the effects of the Hard Limiter will be more or less unnoticeable to the reader.
After setting the RMS at -20.5 dB and running it, head up to the tool bar at the top and click on Effects. Hover over Amplitude and Compression and select Hard Limiter.
At this point in the video, Wes mentions that this will take away some of the headroom in the file. However, considering that the trade-off is meeting the specification and becoming more likely to be published with our 30+ partners, the benefits are well worth it.
Again, what this Hard Limiter will do is effectively chop off anything above -3.5dB in your audio files.
However, this is a valid work-around for content creators if the ITU-R BS algorithm doesn't work, and won't affect the quality of your audio files in any significant way. Plus, thanks to Adobe Audition's batch function, you can easily apply the Hard Limiter to all files at once.
Maximum Noise Floor of -60 dB
(Jump to this section in the video)
Next, we have the noise floor specification. Simply put, the noise floor is what’s present in the audio file when the narrator is not speaking.
To determine this value, pick one of your audio files and highlight an area where the narrator is not speaking and loop that area.
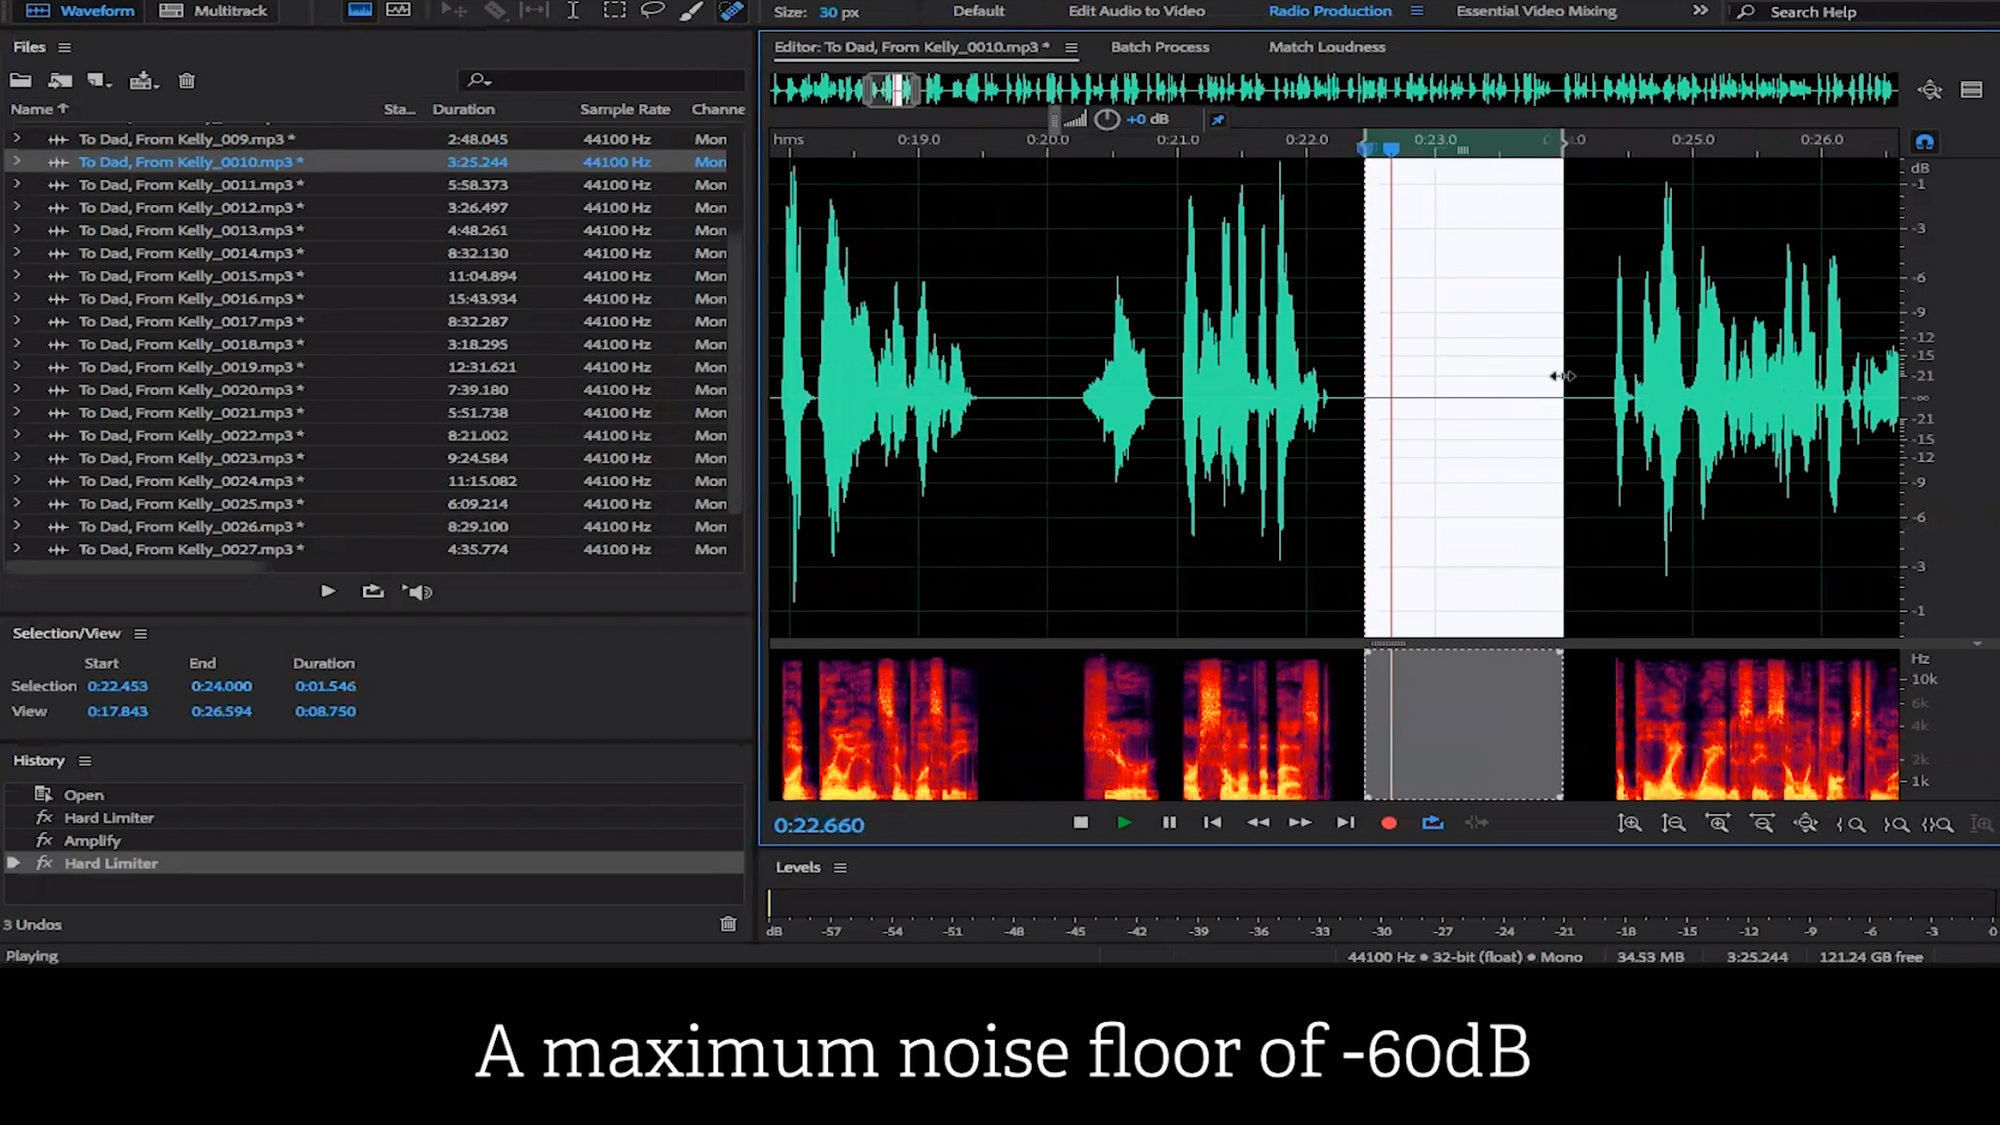
In Adobe Audition, on the bottom right, you will notice a bar that says Levels, where you can easily see the value of the noise floor. Wes uses an audio file that meets our requirement and therefore shows no reading on the Levels bar. This is what you want.
If your audio does show a reading, meaning that the floor is above -60 dB, this is unfortunately quite difficult to fix. This is where your preparation is crucial. That means having accounted for your recording environment, equipment, as well as the setting of expectations with your tracking/post-production engineer, should you have one.
Format: 192kbps or Higher, Sample Rate of 44.1 kHz, Mono or Stereo
(Jump to this section in the video)
Now that we have accounted for the noise floor, we move on to the formatting of the files. This is easily found within Adobe Audition.
Simply navigate to the left panel where you found duration and source format before, and you will find three columns: sample rate, channels, and source format. Ensure each file meets the criteria:
- Format is 192kbps or higher
- Sample rate of 44.1 kHz, and
- All files are either Mono files, or Stereo files (cannot be a mixture of the two)
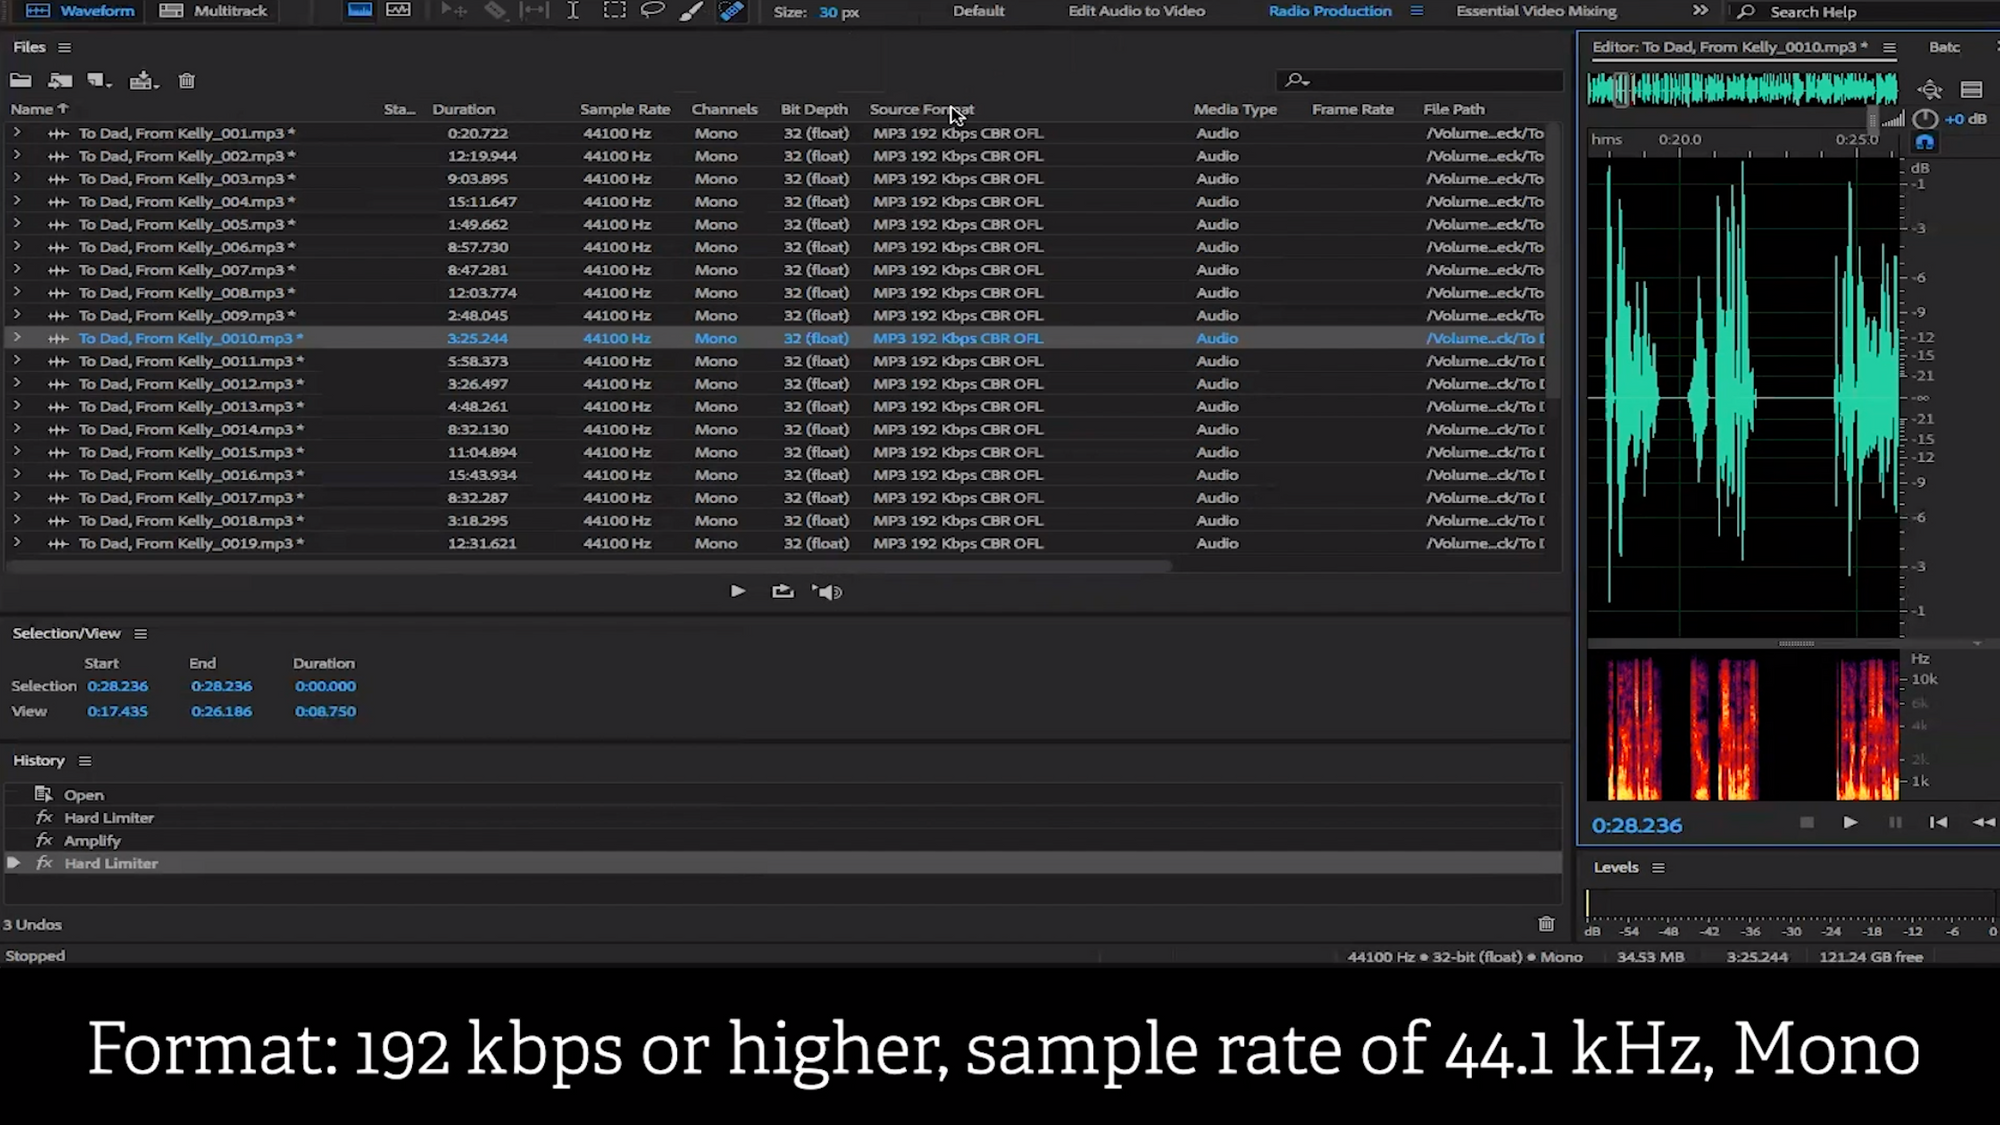
In the video, we can easily see that Wes's audio files meet these requirements.
Head Duration: Between 0.5 and 1 Second of Silence (Room Tone)
(Jump to this section in the video)
The head duration specification states that the beginning of each audio file must contain between half a second and one full second of room tone.
To check this, navigate to the multi-track viewer within Adobe Audition.
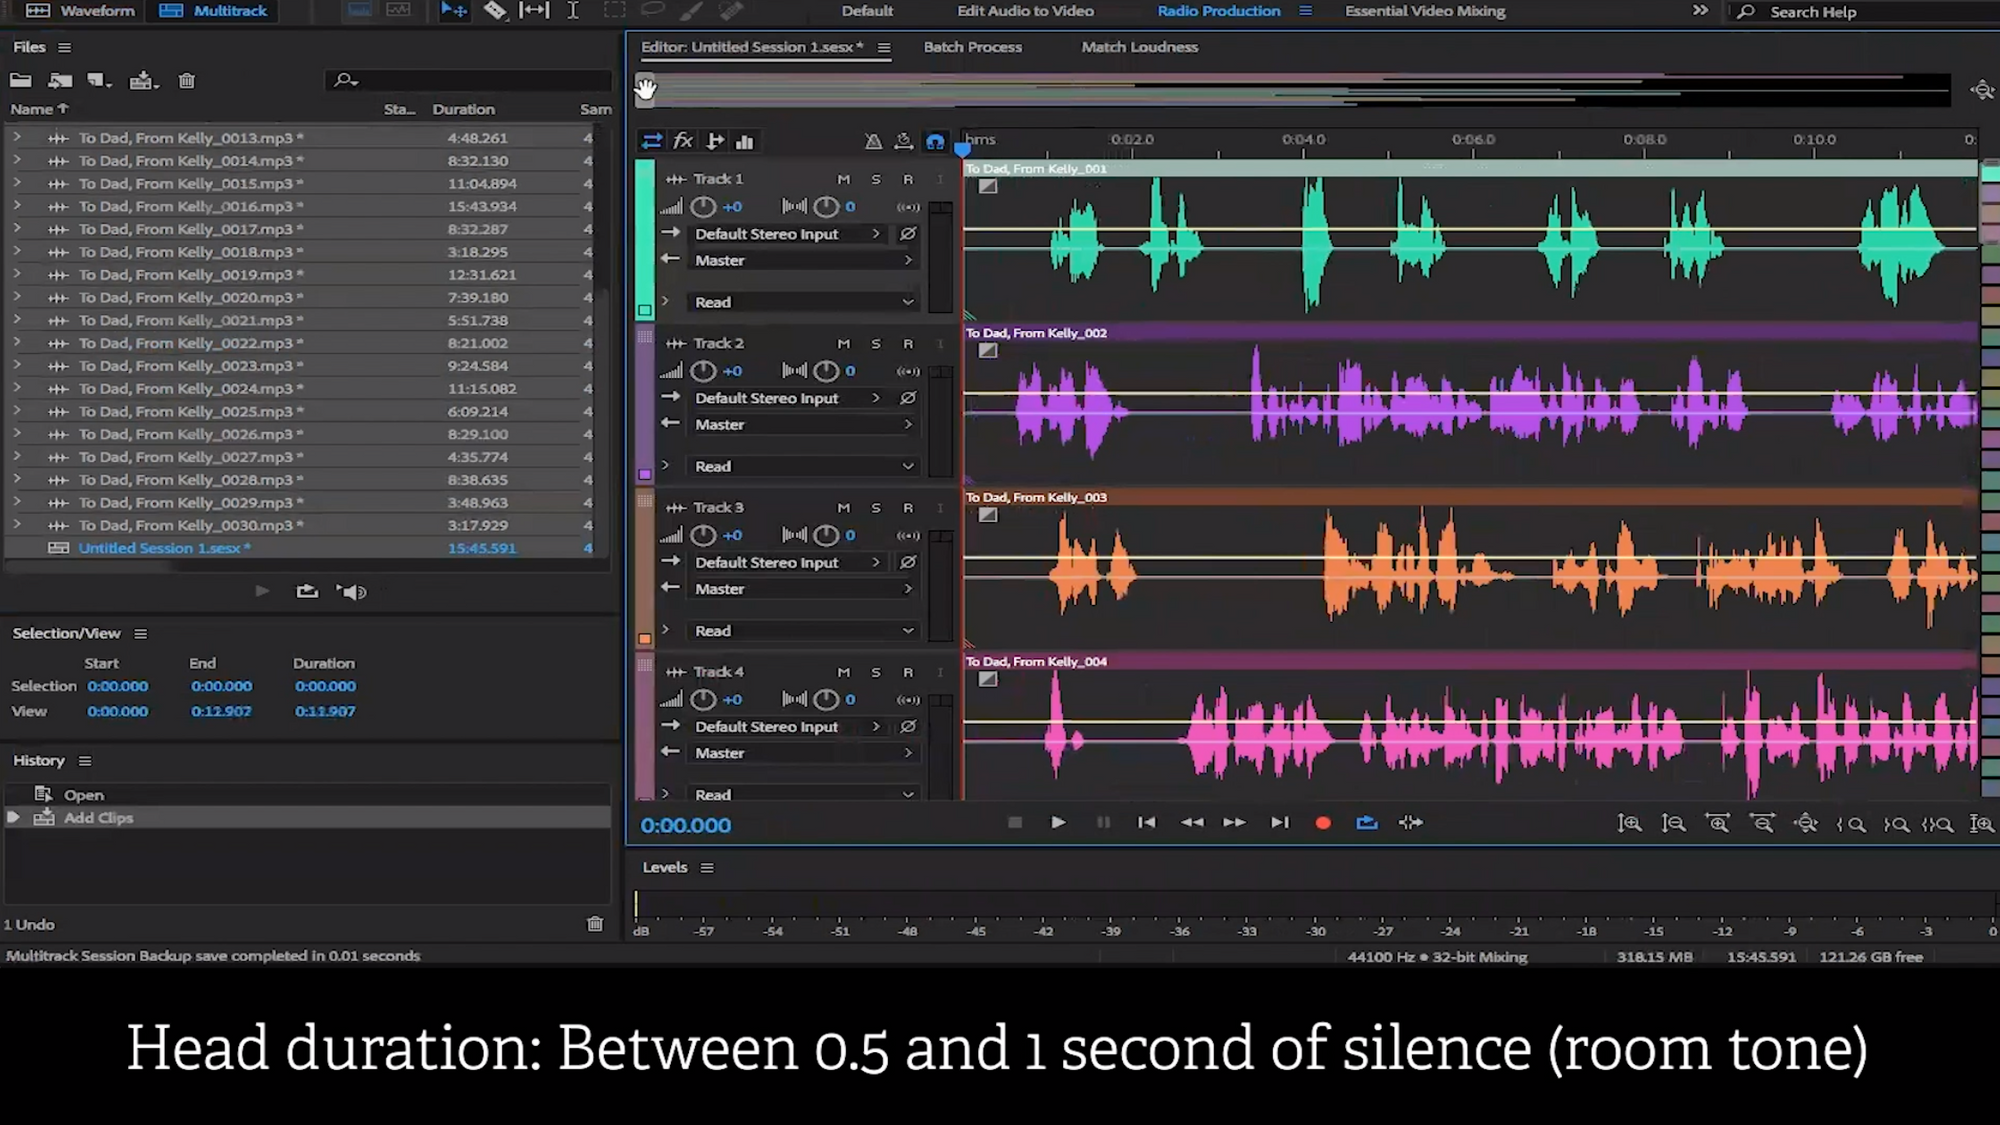
By scrolling while keeping an eye on the timecode bar at the top, you can easily check and adjust your audio files accordingly. Simple as that!
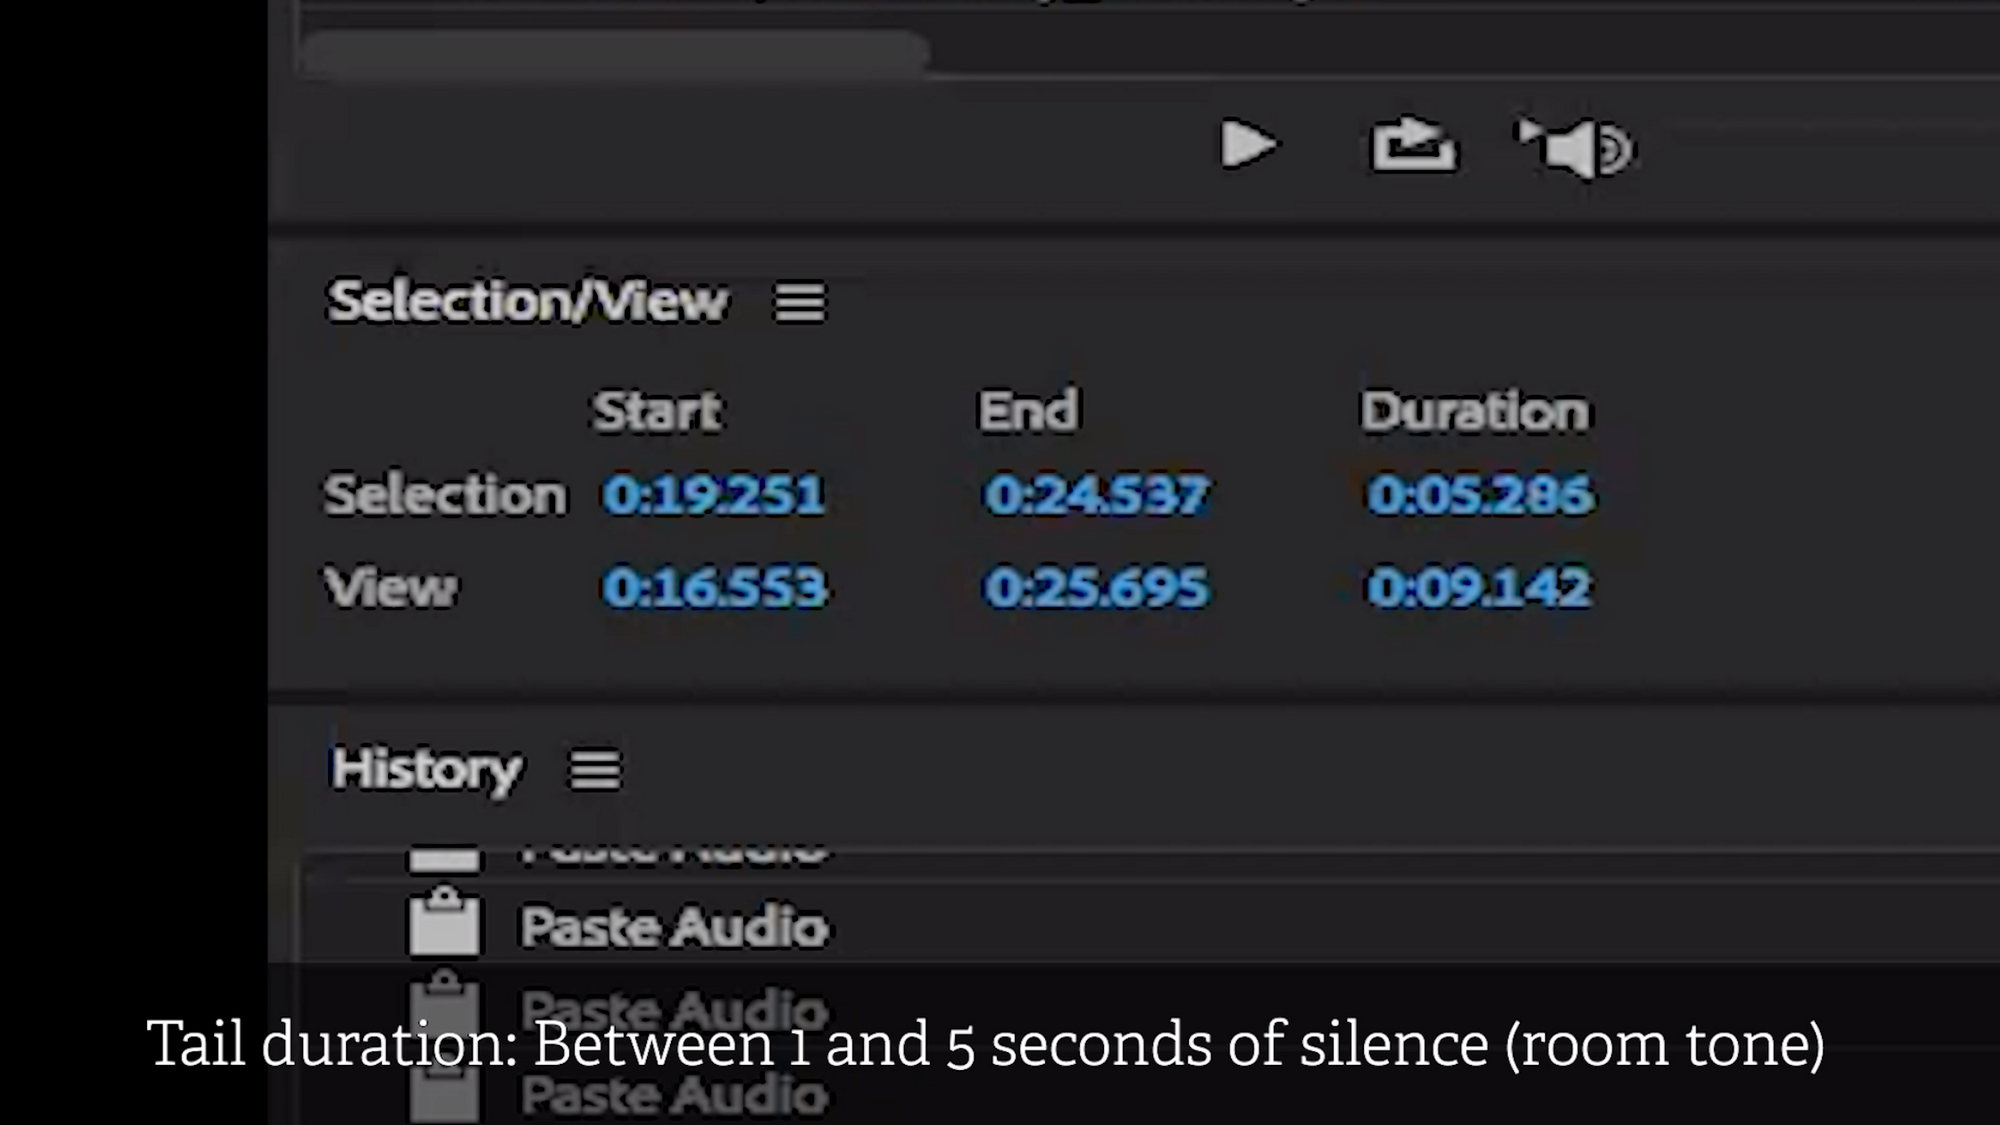
Tail Duration: Between One and Five Seconds of Silence (Room Tone)
(Jump to this section in the video)
Similarly, just as you have done with the head duration, each audio file must also include between one and five seconds of silence.
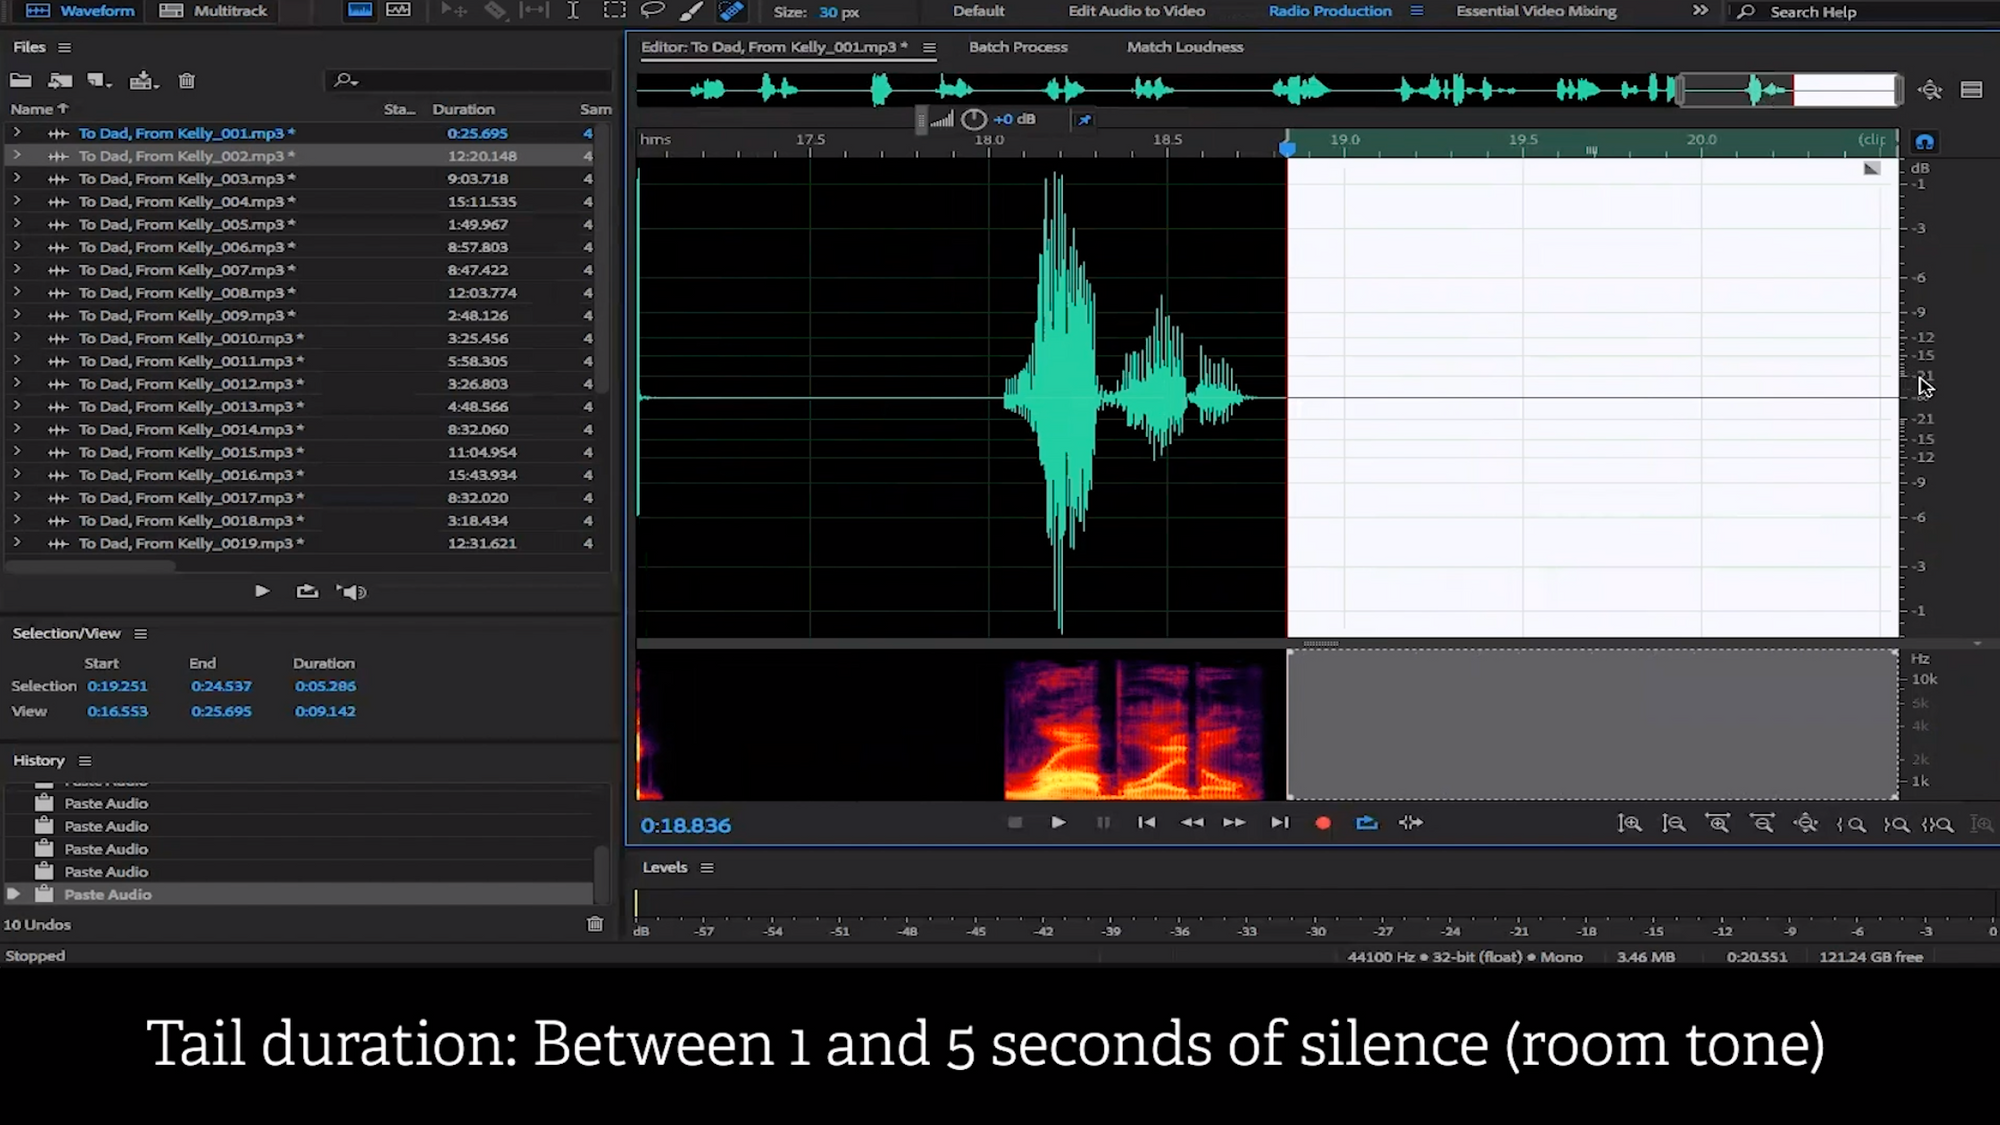
As you can see, Wes simply cut and paste the correct length of silence at the end of his audio file.
In order to do the same and view the duration of your highlighted selection, the selection view panel on the bottom left within Adobe Audition has a handy capture of these details. Thank you, Adobe Audition!
No Copyrighted Materials or Extraneous Sounds (pages turning, etc.)
(Jump to this section in the video)
This includes any combination of background noise that interferes with the audio files. As Wes mentions, this is difficult to detect and to account for in the mastery/post-production stage, i.e. the stage we are at now.
Our advice is to avoid any extraneous noises in the pre-production and production stages!
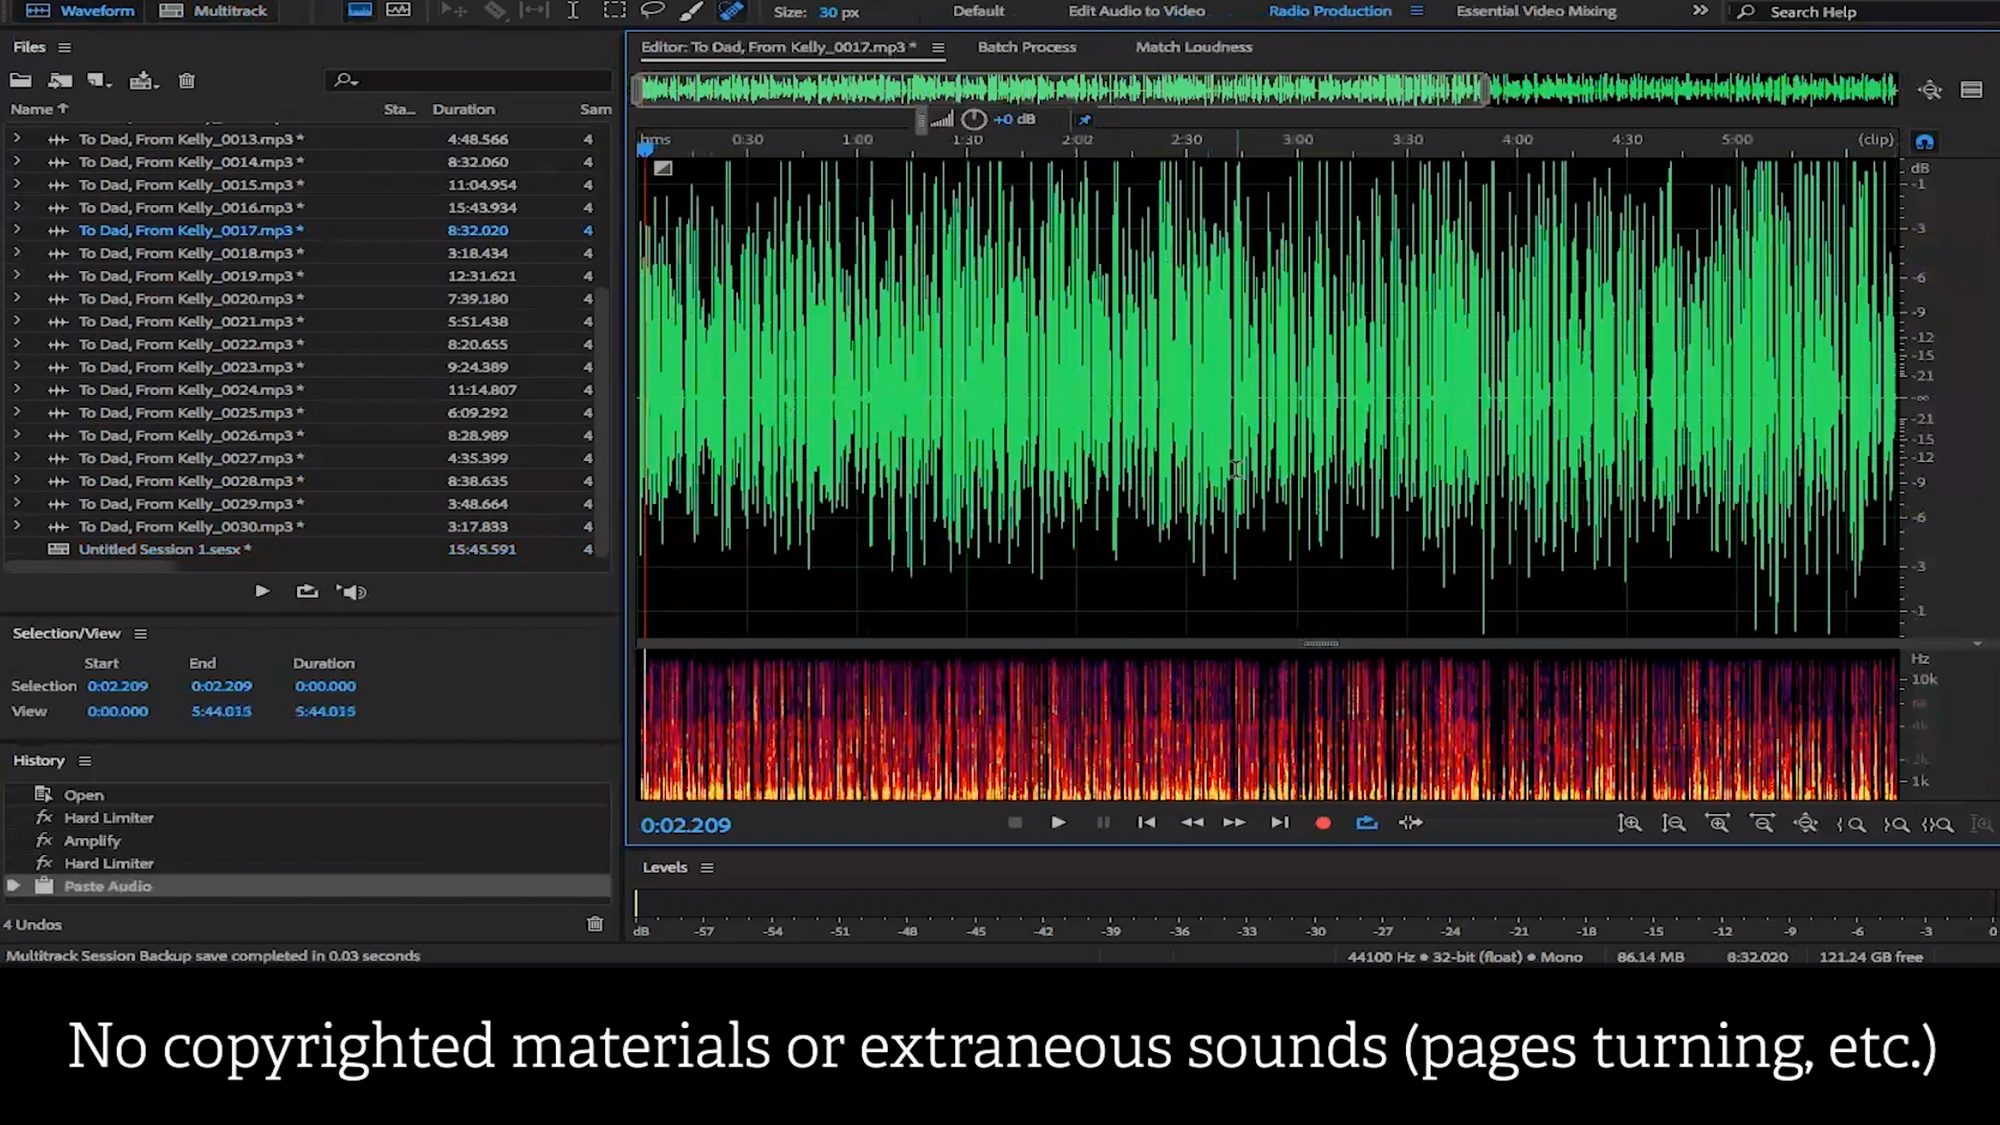
One thing you can try, if there are page turns, is to cut them out of the audio by highlighting the selected piece and deleting it. This is sort of a perfect scenario that probably will not apply to every extraneous noise. For example, any noise made while the narrator is speaking will be difficult to remove.
Once again, preparation is key!
Conclusion
And there you have it! Hopefully this has served as an educational experience for those of you who have had questions needing answered. If you have questions, you can leave a comment on the YouTube video. Be sure to subscribe to our channel so you don't miss more tutorials!
Ready to upload your audiobook? Get started with Findaway Voices now.
Adobe®, Audition® are either registered trademarks or trademarks of Adobe in the United States and/or other countries. Adobe product screenshots reprinted with permission from Adobe.